|
BUILDING A NEW STRIPED S-STYLE! Page 5 |
|
BUILDING A NEW STRIPED S-STYLE! Page 5 |
| I'M THE ONE! | |
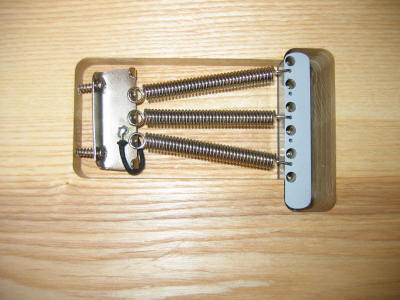
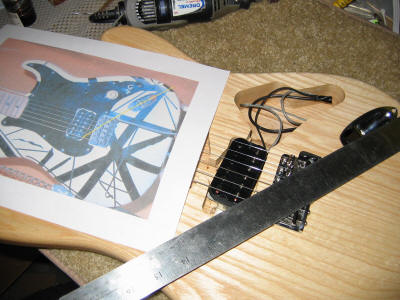
| Wiring it Up We had some real vintage cloth-covered wire, so we decided to use some of it for our ground. We scuffed the tremolo claw (left) with some heavy grit sandpaper, heated up the soldering iron, used a little flux, and, we had a ground! We looped the wire around the bottom side (ala EVH) rather than running it between the springs like a real vintage Strat. This spring setup is the same as the one seen in the Van Halen photos at the "Day on the Green" concert in July 1978. The photos in Neil Zlowzower's book are fantastic. You can see in the bottom photo that we have it wired without a volume pot. This was just to make sure the thing "rocked" without having to do much wiring and installing the pickguard. The next challenge was to make sure the jack cup was in the proper position. We had never really thought that much about it, but it is easy to screw-up the positioning of the cup in the cavity. Here is a photo of the photo of the "proto guitar" with a yellow alignment line drawn across the two screws in the cup. We made this with PowerPoint. Using the photo as a guide, we used a ruler to align the jack cup with the bridge and the pickup. This process ensured that the jack cup would maintain the proper relation not only with the bridge, but also with the paint stripes. OK -- time to remove the strings and get the pickguard installed. |
|
|
|
|
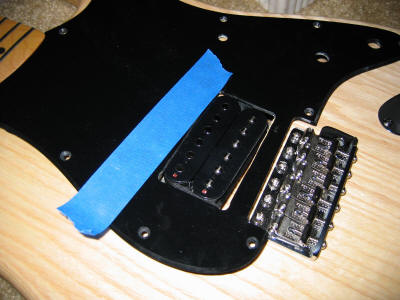
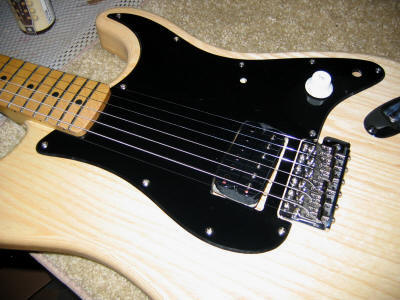
Mounting the Pickguard The "proto" guitar of Mr. Van Halen had a pretty crude pickup route in the black pickguard. As you'll recall the pickup was mounted in relation to the bridge. Therefore, the pickguard had to be modified to fit into its proper position. As you can see in this photo the pickguard is positioned too far to the "south". Some plastic had to be removed to ensure it fit. We used a Dremel tool with a sanding drum to enlarge the cavity in small increments. The blue tape was a general line of "cut" for the route. Once we got the fit right, we taped the pickguard to the body and marked where the pickguard screws would be installed. Once marked, we used a 5/16" bit to make a pilot hole for each screw. Then, making sure we used beeswax on the screws, we screwed them into the body without the pickguard. Why would you do that? To make sure the screws would go in easily prior to installing the pickguard. This may prevent a terrible gouge in the pickguard if a screwdriver slips off that little screw. |
|
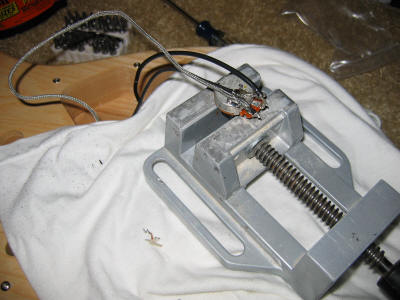
| Adding the Volume Pot With the screws installed and the jack cup in place it was time to solder the pot in place. This is a 500k pot -- just like the original. Nothing too interesting here, but there are a couple of safety tips. Safety Tip 1. Make sure you protect the top of the body when you solder. Safety Tip 2. A little drill press vise like this one can make your life much easier. A solid hold on that pot will make your work go faster. |
|
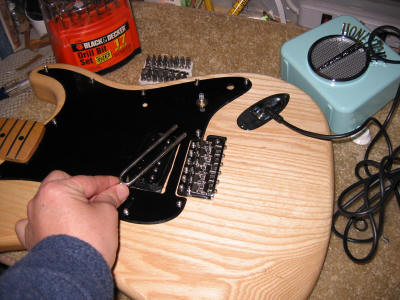
| Checking it Out With the pot wired, we took the pickguard screws out of the body and stuck the pot in the pickguard. With the pickguard in place, we wanted to test the pickup and wiring before stringing it up. Here is our little test rig -- a Danelectro Honeytone battery-powered amp. With the amp turned on, we used a tuning fork -- yes, a tuning fork -- to ensure the pickup was working properly. It also allowed us to exercise the volume pot to make sure it worked. Just bang the tuning fork on your knuckle, get it vibrating, and hold it over the pickup. You'll get a nice A-440 tone. With the limited electronics working, it was time to finish it up. |
|
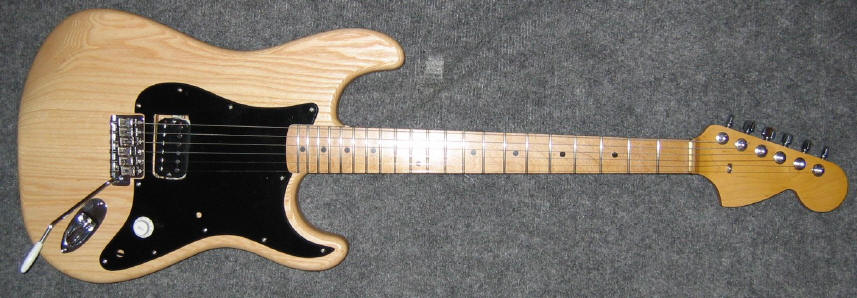
| ROCK! Here is the body with the pickguard installed, "Tone" knob in place, and strings on and tuned. We got the pickguard alignment right, and the guitar sounded great through the little Honeytone. What a great little amp. We installed the trem arm, put some lubricant on the brass nut, and started playing it! We still haven't decided on whether to use Straplocks or the eyelets Mr. Van Halen used on his guitar. We can wait a while for that. We just want to drill the holes before we paint. In the meantime, it is time to play this rig! |
|
|
|
|
Next up: WHAT KIND OF PAINT JOB SHOULD WE PUT ON IT? CLICK HERE TO FIND OUT!
|
|
| ATTACK HOME | BUILDER'S GALLERY | ||||||||||||||||||||||||||||||||||||||||||||||||||||
|
|||||||||||||||||||||||||||||||||||||||||||||||||||||