|
BUILDING A NEW STRIPED S-STYLE! Page 3 |
|
BUILDING A NEW STRIPED S-STYLE! Page 3 |
| Let's get it ready to rock.... | |
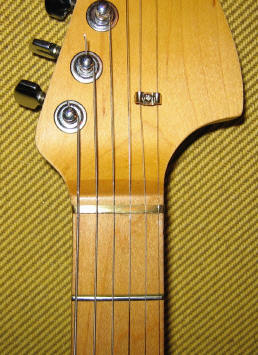
| Install the nut It turns out that the genuine Fender Malmsteen Strat brass nut was just a little too big for this "custom" neck. We didn't want to destroy a pretty expensive piece of brass, so it was off to eBay to find some brass nut blanks. We scored three blanks for a "Buy it Now", and soon they arrived. Well, they were blanks all right. They were the proper thickness, but they were literally brass rectangles, ready for the touch of an artist! We went to work with our files, belt sander, and old-fashioned elbow grease. Click here to see a good tutorial from Stew-Mac. You can also see the string tree installed on the headstock. This is not the position normally seen on a real Fender Strat, but this is position used by EVH on his original guitar. Interestingly, this string tree came with the vintage Fender bridge kit. |
|
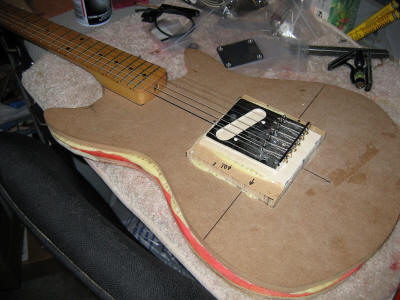
Complete a Fret Level and Crown Here is our neck attached to our surrogate body. We use this body when working on vintage-style necks primarily because it is nearly impossible to adjust a heel-adjust neck while it is on a regular Strat body without scratching or gouging something. As you can see here the neck adjustment nut is exposed and easily adjusted. This neck took a little cranking to get it straight. Remember to always tune the guitar to pitch and measure the neck's straightness in playing position, not laying down flat. This is important to remember because it does make a difference. |
|
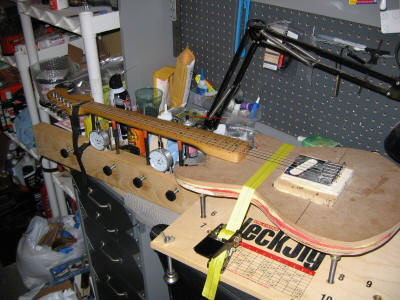
| Here is our neck in one of
our Stew-Mac neck jigs. As you can see the surrogate body straps down
easily, and we don't have to worry about gouges and scratches. There are instructions on the Stew-Mac site on how to use this rig, but what you are doing is simulating string tension when you level the frets. I use 320 grit 3m Sandblaster sandpaper on a 9.5" radius block to level the frets, then I go up to 1000 grit to get the sanding marks out. I use a diamond fret file to crown the frets. This makes the flat tops of the frets - flattened during the leveling phase with the sandpaper - into curved ones. Safety Tip: Time and care spent here is the difference between your guitar playing "OK" or "killer". Take your time! |
|
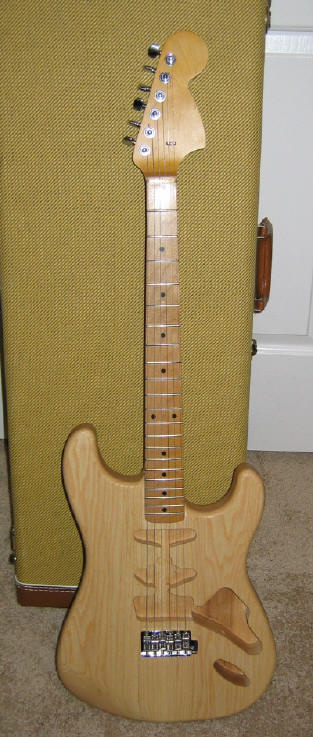
| The Guitar Now Plays! After we got the neck straightened out we put it on the ash body and strung it up. We had to wiggle the neck around a little to ensure it was lined up. Safety Tip: Install the two E strings first and align the neck. Leave the screws a little loose until it is aligned. Once the four neck screws are tight, install the other four strings. It played and sounded great, acoustically. This is a pretty good indicator that the guitar will sound good when we finally plug it in. We tried to slide a humbucker in under the strings, but the routes were not deep enough. The routes are of vintage proportions, so it leads me to believe that Mr. EVH had to hog some extra wood out of his original Strat, or he had to adjust the legs of the pickup to get the pickup under the strings. More to follow on this. Safety Tip: Let the guitar sit like this for a few days and check the action again. Note: We are doing all of this work BEFORE we paint the guitar! |
|
Next up: Get the AttackBucker pickup finished and wire it up...keep checking back!
|
|
| ATTACK HOME | BUILDER'S GALLERY | ||||||||||||||||||||||||||||||||||||||||||||||||||||
|
|||||||||||||||||||||||||||||||||||||||||||||||||||||