|
OUT OF LOVE! |
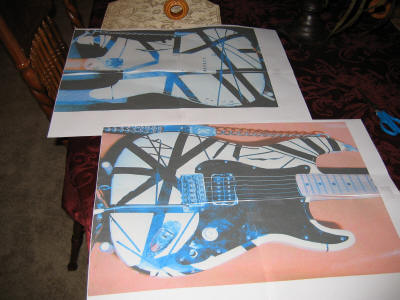
| Printing Templates
Laying out the stripes on this guitar is a pretty precise
operation. Our technique was to print two life-size templates to help
guide our work. Here is a photo of the two templates. Using our
trusty copy of CorelDraw, we imported the photos and stretched them to size.
How do we know it is the right size? We measured
the bridge and pickup and used them as guides to stretch the imported photo
to size. Once it was right we printed using the "tile" option in
CorelDraw. Caution -- this uses a lot of inkjet ink!
This is always a good method to check the size of your
stripe tape. If the tape is too wide or too narrow, the stripes on the
guitar will not look right.
|
 |
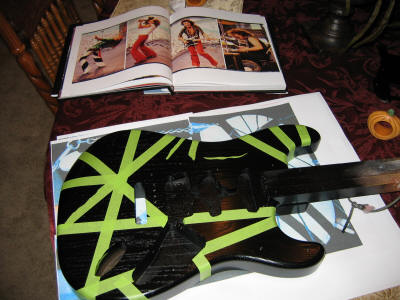
| Taping the Stripes
Using our 3M green tape we started taping. Take
this step extremely slowly! As you can see here, the template and the
Neil Zlozower VH book were our guides.
The tough stripes are the small "half stripes" at the top
of the guitar, the little wiggle above the front two pickup routes, and the
"ripped tape" stripe at the back. Note there are no "little stripes"
on the paint like those Charvels. We are using real pinstripe tape
like the original for the small stripes.
We used a guitar pick to smooth down the big stripes and
make sure they were snugged down.
Safety Tip: Tape then paint. Do not
leave this tape on the guitar for more than a day or two. |
|
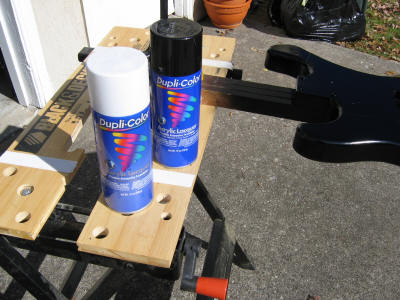
Dupli-Color Acrylic
Paint This is the paint we recommend for the
build. We bought it at Autozone and it really goes on smoothly.
Black and white -- how simple is that? You can
see the body in the background. We are a little out of sequence here
-- of course we painted the body black before we taped it! The body is
on our "paint stick" and clamped to a Black and Decker WorkMate. Don't
use too much paint. We used about a can of black and about 1/2 can of
white. More on this later. We didn't use
any pore filler and we did not tape the "pinstripes". We are trying to
make this guitar as authentic as possible, and don't want to spend $25,000. |
 |
| Black Paint on Tape
No, it's not a Frank Zappa song. It is an old hot-rodder trick for
masking stripes. Once the tape was snugged-down,
we put a light coat of black on the guitar. We made sure the tape was
completely covered with a light coat of black.
This will help keep the paint from seeping under the
tape when you start with the white paint. |

|
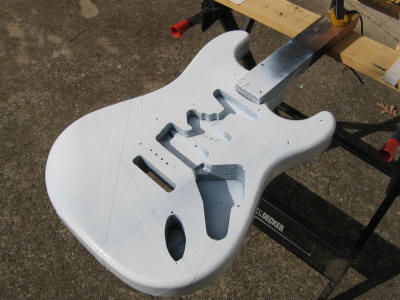
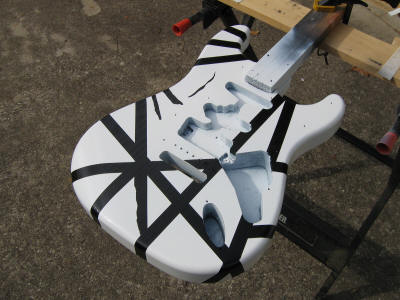
| White Paint over Stripes
(White Stripes?)
Once the black paint was dry enough -- a little tacky is
OK -- we started with the white paint.
Do not go to heavy on the white. Use just enough
to cover the black paint. If you use too much white, it will leave
ridges of paint next to the stripes and just generally look awful.
We guess that about three coats is all you need.
You'll have about 1/2 a can of paint left. |
|
| Removing the Tape
Once the white paint was dry, but still a little tacky,
we pulled the paint. This is a finesse operation! Practice on
scrap before you do the real thing -- you have to be very deliberate and
delicate when you remove the tape.
If you wait until the paint is completely dry you won't
get a crisp line. Make sure you pull the paint at a 45 degree angle to
the stripe and keep the tape low to the body as you peel it off. This
seems like the best method to keep the white paint from lifting. |
 |
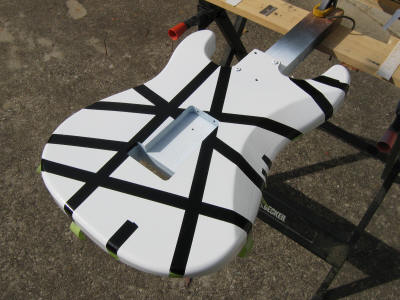
| The Back
Nothing new here -- we just thought the back looked
pretty cool.
The tape on the top horn is pretty tough to get right.
We actually had to cut the tape with a razor blade to get it to look right. |
 |
Next up: TIME FOR PINSTRIPES!
|
Back to Page 5, Go to
Page 7 |
Back to Top |
