|
BUILDING A NEW STRIPED S-STYLE! Page 1 |
|
BUILDING A NEW STRIPED S-STYLE! Page 1 |
| We
have had a great time with our first Striped S-Style. Did we sell it?
No! Did we get a note from some goons telling us to cease and desist?
Of course not -- this was for personal use only! No, we don't sell
them! We saw the Charvel/Fender Van Halen guitars at the 2008 NAMM Show, and we decided to build another one. We didn't want a red one with the reflectors and the Floyd Rose. No, we had to have an original, all the way down to the brass nut. This is how it went down starting in late 2008... |
||
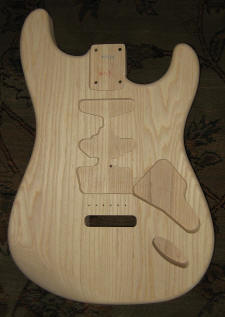
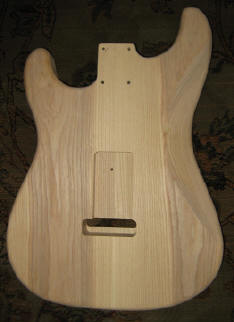
| From KnE guitars comes this
killer Northern Ash S-Style body with some very accurate routes. The
original "luthier" who built this guitar used a chisel. We believe the guys who
made this body used a CNC machine, but we are not experts. Note there are no holes for the pickguard or backplate screws. This is very accurate for this particular guitar. There have been suggestions that the guitar seen on the cover of Van Halen had a real Fender Strat body from the late 50s. I believe this is incorrect based on exhaustive (exhausting) research. One piece of evidence is that the black and white guitar did not have screw holes for the rear trem cover. So, if your are building one of these, fill those holes. |
|
 |
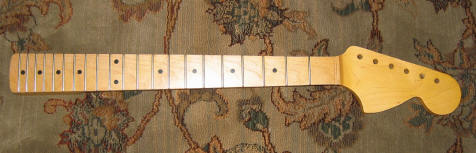
| We wanted a neck with the late 60's big headstock. We bought this from a guy who is a custom builder in Pennsylvania. We'll let you know how it works out. Note this guitar has no "skunk stripe" on the back, and it has all of the appointments we were looking for to make an authentic-looking S-Style. The plan is to get the guitar setup and playing then strip the finish for that authentic look. A Gibson decal is also required. |
|
|
|
|
||
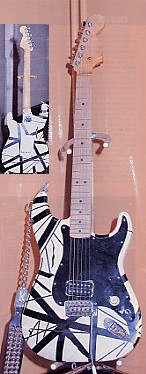
| Where does
the tape go? This is a redux from our first publisehd build, and represents the most common question concerning this guitar: How did we decide where to put the tape? How wide is the tape? Whew...this was a process. Here are some shots of a well-known Strat clone. We imported the photo on the left into CorelDraw and started taking measurements on the stripes by using the "known distance" method. We knew the distance from the nut to the bridge is 25.5". By stretching the photo so this distance was correct in CorelDraw, we were pretty certain that it was at the correct scale for measurements. We had a few surprises, but ultimately got the correct tape on hand. We always use good quality 3M tape, and it does make a difference. Next up: Put the guitar together, get it setup, and tape the stripes! |
|
|
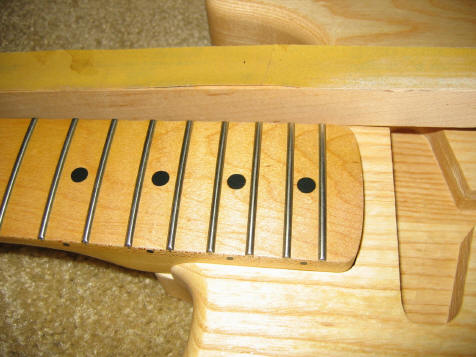
| Step 1: Install the neck. When you mix parts from different manufacturers there are never guarantees that they are going to work well together. I've found this to be the case with bodies and necks. When I test-fitted the neck it would not fit into the cavity. I lined-up the lower-cutaway side, and I found that the cavity was just a few millimeters to small. Safety Tip: Don't sand the neck in these situations -- always sand the body first.
|
|
|
| Using some great, uncharacteristic patience, I
used a flat piece of maple with 220 grit sandpaper taped to it to carefully
remove some of the wood on the "north" side of the neck pocket. After several iterations, the neck fit into the pocket. Safety Tip: Don't make the pocket deeper, and use the technique of sand/check, sand/check over and over again until the neck fits. |
|
|
|
||
Go to Page 2 |
||
| ATTACK HOME | BUILDER'S GALLERY | ||||||||||||||||||||||||||||||||||||||||||||||||||||
|
|||||||||||||||||||||||||||||||||||||||||||||||||||||