|
BUILDING A NEW TELECASTER! Page 2 |
|
BUILDING A NEW TELECASTER! Page 2 |
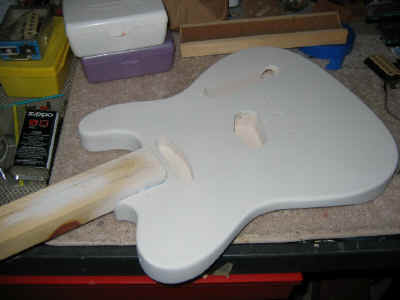
| Step 4: Finish the
Body We decided that we must put a solid finish on the guitar after examining both sides of the body very closely. This particular Saga guitar is made of about six pieces of some type of wood...some would say basswood...and is covered with an incredibly thick coat of sealer/primer. Here is a shot of the body after we shot two coats of BINS shellac primer on it. While BINS is not particularly easy to work with, it will stick to anything, and makes a very nice base for solid colors. Note the custom handle...glued together with Gorilla Glue, this will never come apart!
|
|
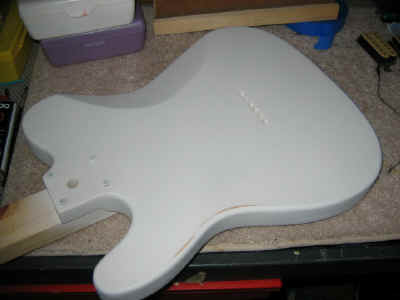
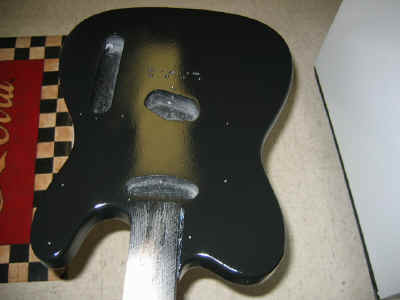
| Here is a shot of the back after priming.
Notice the strip of bare wood near the lower bout. The primer coat was not
level, and we would have found that out after we sprayed the color coats....that is why
you prime! As you can also see, we drilled the six holes for the ferrules after installing the bridge. This is not a procedure for the faint of heart, and it is really easy to screw this up. Safety Tip: If you decide to install ferrules on the back of your Saga, be extremely careful when you start to drill. The sealer will crack and pop like epoxy, which is what we think it is! We recommend laying out the holes on masking tape and drilling through that because it will help with the chipout. If you don't strip the body, make the initial holes through the sealer with the drill in reverse...once you hit wood, drill forward. We always second guess ourselves on whether or not the holes are lined up, but then again, there are lots of old "real Teles" out there with their ferrules not properly aligned. Practice on scrap to get the alignment down, and use a brad point drill bit...it will keep it from wondering. We'll show you the first color coats later...right now the body is drying. |
|
| Step 5:
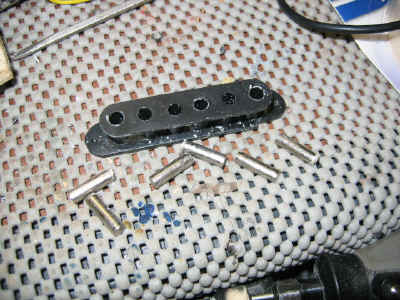
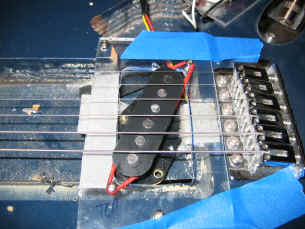
Work on the Electronics We didn't particularly like the sound of the pickups in this rig, but we didn't want to buy new ones. In short, we could rebuild the pickups that came with the kit. Here is a shot of the neck pickup, uncovered and unwound. The bobbin is of decent quality, and you can see the slugs in the foreground. The magnet is on the bottom of the pickup, unlike Fenders which used six individual magnets. We decided to rebuild both of the pickups using Alnico V slugs. Note: Not all of these pickups have bobbins that are worthy of a rewind. |
|
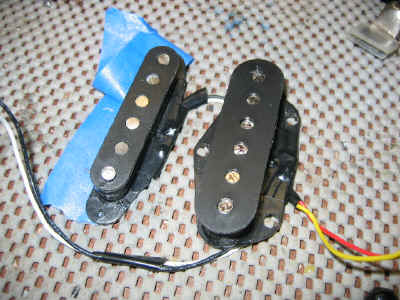
| Here's a shot of the pickups
after being rewound. The magnets are not permanently mounted in the bobbins
yet. You can also see the numbers on the top of the magnets. We used our
gaussmeter to "grade" the magnets and make sure they were all about the same
strength. The variance in the strength of the magnets are pretty wide, and, based on
our analysis, the best sounding single coils have "balanced" magnet
strength. If you do this, remember to check the polarity of the pickups. The
lead pickup is "south up", while the neck pickup is "north up." We may switch the magnets around and check our inductance numbers. Magnets do make a difference in the readings and the sound of the pickups. The next step on these is to glue the magnets in and pot the pickups in our AttackWax formulation. We are also going to replace the pots and the switch...just for good measure.
|
|
| Back to Step 4...Finish
the Body Here is a shot of the body with a couple of coats of black already shot. The ReRanch Black went on pretty smooth, but we developed some pretty good orange peel on the second coat. Not to worry...it'll sand and buff out. We've ordered a red pickguard...standby for more on that. Next to come...more clear and a couple of weeks to cure. We're just starting to have second thoughts about black...more to follow. |
|
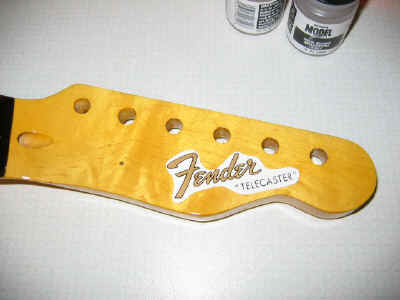
| Step 6...Finish the Neck Here's a shot of the headstock. Check out the color -- classic aged nitro! The photo shows the proposed decal in the proposed location. I can see it now...Are you breaking the law? Are you trying to deceive? Absolutely not. This is a personal guitar. It is like putting Shelby badges on a fiberglass Cobra replica. It is like Max putting Gibson on those cool '59 Sunburst Les Paul replicas...then keeping them for himself instead of selling them to Slash. The true moral of this story is that if you buy a guitar on eBay, let the buyer beware....it really is like a box of chocolates! There are so many good fakes out there, I don't think I'd buy anything without "beyond the shadow of a doubt" documentation...and an original owner. BTW -- that also goes for supposedly new USA Fenders...how do you know it's not a Saga? |
|
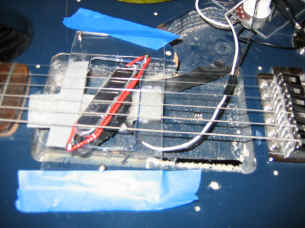
| Back to Step
5: Work on the Electronics The weather is cold, so we decided to pot the pickups and check them in our special "price is no object as long as it's under $100" Test Guitar. Here are our two rewound, remagneted (is that a word?), and potted pickups mounted in our test guitar. While we are not experts, we thought the pickups sounded great. We did a number of pseudo-scientific experiments on the pickups using a wide variety of cobbled-together test equipment, but this particular test -- the "taste test" -- seems to be the most immediate and satisfying. From shred to country to some jazz chords, both pickups sounded extremely smooth, and should sound great in our new guitar. By the way -- the neck pickup reads 6.35k Ω resistance, and the bridge pickup reads 7.45k Ω resistance. The bridge pickup is particularly hot and bright. Awwwright!
|
|
|
|
| Keep checking back for updates! | |
| Go to Page 1, Page 3 | |
| ATTACK HOME | BUILDER'S GALLERY | ||||||||||||||||||||||||||||||||||||||||||||||||||||
|
|||||||||||||||||||||||||||||||||||||||||||||||||||||