|
BUILDING A NEW T-STYLE! |
|
BUILDING A NEW T-STYLE! |
| We enjoyed our last T-Style Kit so much we decided to build another one. Here are the details. | |
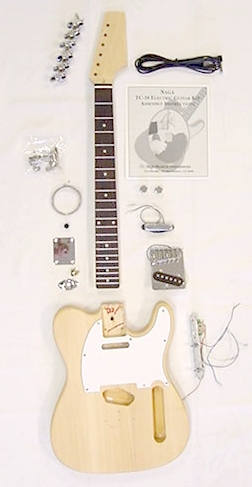
| The Saga T-Style Kit. You can get these
on eBay from the seller bretbuysstuff for about $100 with shipping. Note: As stated before, the kit is pretty close to a real Fender Telecaster. However, the back has a cutaway much like a Strat, and the strings do not go through the body -- they mount to the bridge. As always, our first step was to complete an inventory even though we decided to upgrade the hardware. We decided not to make this a relic-looking guitar...time to try something different! We've also decided to string it up and play it for a while before we finish it.
|
|
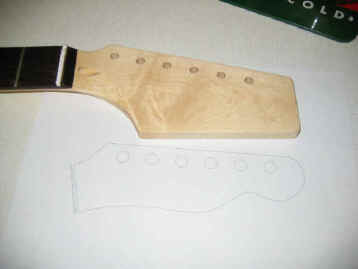
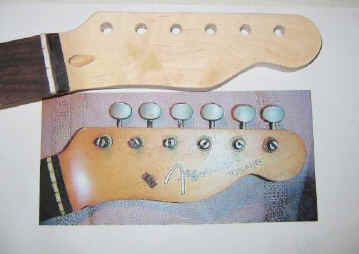
| Step 1:
Finish the Neck We didn't want to try anything particularly new on this guitar, so we finished the neck just like we did on the Mattocaster. After we stripped the neck, front and back, with CitrusStrip, we sprayed two think coats of clear lacquer to protect the raw wood. After it dried, we had to cut the headstock into some sort of shape. The top photo shows our attempt to draw the shape of the headstock we wanted using Rhino3D. The Saga's headstock isn't exactly the right shape for the cut we were looking for, so there was some adjustment. The second photo shows the cut headstock in relation to our "model" headstock found on the internet. We think the look is pretty convincing even though the top contour of the headstock was incorrect from the factory. Just check the distance from the nut to the first tuner hole and you'll see what we mean. We finished off the headstock with a used set of Grover Minis we scored on eBay for almost nothing. They were in great shape, and we prefer them to Schallers. Grovers and Schallers use a 10mm hole, and the Saga's tuner holes are tiny in comparison. Get a reamer -- we got one from Micromark.com -- and carefully ream out the tuner holes. I don't recommend trying to drill them out...way too easy to screw up. Alert: I would not buy a "vintage" guitar on eBay for any amount of money! The fakes are too convincing. Get the emotions going and you'll charge just about anything on that MasterCard...or PayPal.
|
|
|
|
| Step 2:
Install the New Bridge Like Paul and Pauly on American Chopper, we've adopted the practice of "mocking up" the guitars prior to finishing. The Sagas, while pretty cool, have some odd holes here and there, and we recommend putting them together and getting it all lined up prior to putting down that killer finish. We've been burned before, and chipped up a cool finish trying to get everything to fit...for the first time! We bought this bridge on eBay, and it is really nice...much nicer than the stock bridge. However, the holes didn't line up and we had to do some major measurement/drilling. When we got it on the guitar, it really looked great. Note: If you don't get the scale measured correctly, there is probably no going back without some extra holes in the body!
|
|
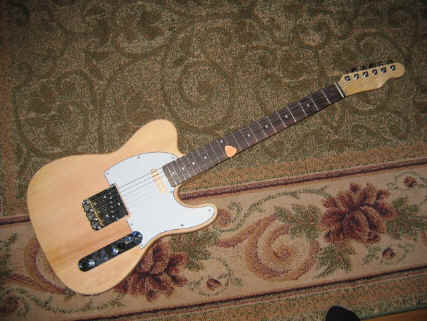
| Step 3: String It Up We bolted on the neck, hooked up the lead pickup, and strung the guitar up to see if it would work. What we found was that there was some significant fret work required to get this rig playing correctly. Once we got the action right, the guitar played great. We feel ready to take the guitar apart and start the final finishing. |
|
| Go to Page 2! | |
| ATTACK HOME | BUILDER'S GALLERY | ||||||||||||||||||||||||||||||||||||||||||||||||||||
|
|||||||||||||||||||||||||||||||||||||||||||||||||||||