|
REFINISHING THE TV YELLOW ATTACK FM |
|
|
|||
| Since
finishing this guitar we have been second-guessing ourselves on the accuracy
of the TV finish. In particular, we had always thought that it was
too yellow. After checking out some original TV guitars from the
50s, it was clear that the old-time Gibson TV finish was much more blonde
than the paint on our guitar. After fixing the neck
challenge, we were faced with a dilemma: either touch up the TV finish
on the neck, knowing it was too yellow, or do a complete refin. Well,
the second option won out, and we starting stripping the guitar on a nice
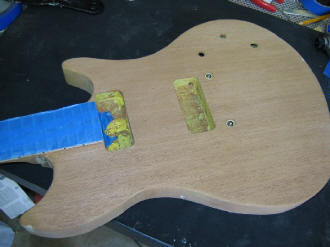
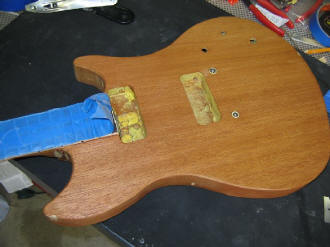
Saturday morning. The top shot on the right is the guitar with the
yellow paint gone. Safety Tip: When following ReRanch directions for the TV finish, you spray the yellow directly on the unsealed mahogany. That is fine...until you try to strip the finish off! It took an inordinate amount of time to get the yellow out of the body's grain! Consider a seal coat prior to the yellow. The photo on the right is the stripped, clean body with a thin coat of shellac. We will usually use shellac to seal a body after stripping to ensure that there is a good barrier between any leftover stripper and the top coats. It is a really nice piece of wood, and the grain is very pronounced. What's next? We are going to put a more traditional finish on this guitar with nitro lacquer. |
|
||
 |
|||
|
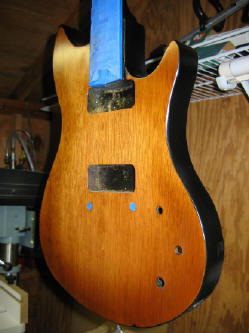
Here is a shot of the guitar with a coat of Lawrence-McFadden's sealer as well as the black edge for the upcoming burst. The black edge and the top of the headstock are DupliColor Classic black lacquer. This lacquer is acrylic lacquer, and it is compatible with the nitro lacquer I will use for the top coats. There is a thin band of light tobacco brown sprayed on the perimeter of the top to help the transition with the darker burst. It is almost imperceptible here, but it will really show when the dark coats are on the guitar. This technique is the one shown on the ReRanch website which is linked from the Links page. I used a piece of poster board to make a template for spraying the sides. I also sprayed the neck joint and bursted the neck near the joint. Why the dark edge? Well, the body had some damage that had to be covered, but the wood is so pretty we didn't want to cover it up. The solution? A dark sunburst with solid sides. Also note that we are going to camouflage the holes used to mount the pickguard. |
|
||
| Here is a shot of the burst
before I started spraying clear coats. I sprayed the burst with an
airbrush with a shader (color in a lacquer base) made with TransTint dyes.
The Tobacco Brown and Black TransTint made a great looking tint. Click on the photo to see it full-size....the color looks pretty cool. We finished up the clear coats, and the guitar just kept looking better and better.
|
|
||
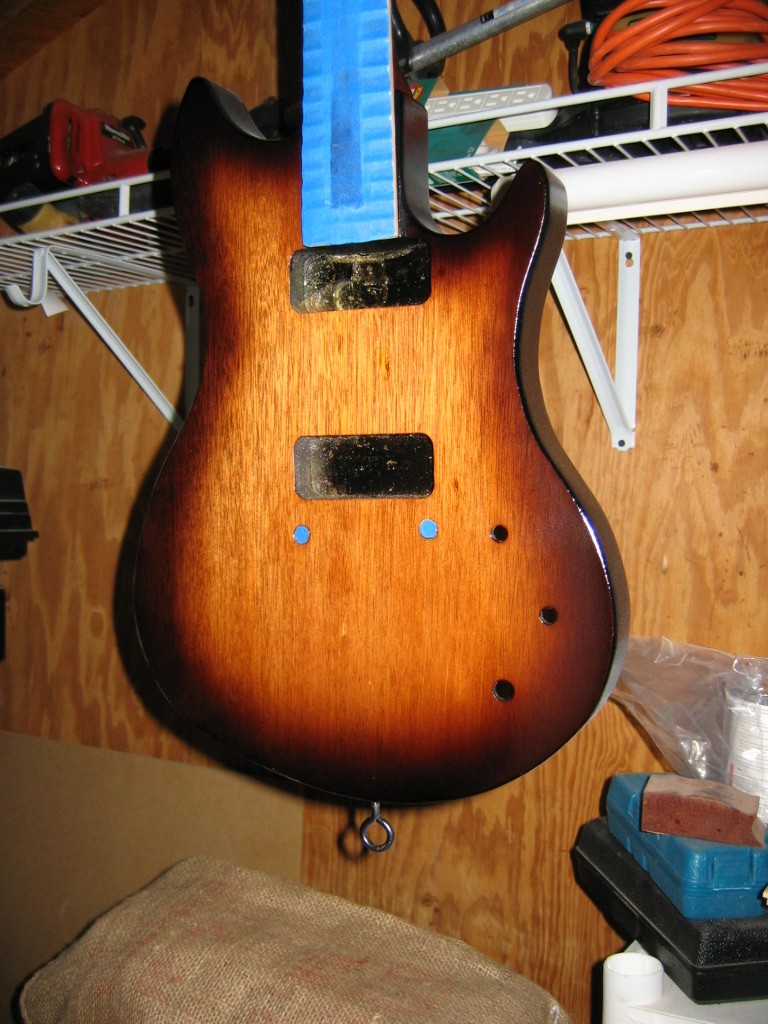
| Here is a shot of the
back while the guitar hangs in the storage room, getting ready for buffing.
You can see the burst on the heel of the neck, and that the rest of the back
is natural. The grain is just beautiful, and we hated to cover it up.
Also, this is like the finish on our old Gibson Les Paul '55, and we
really like it. We'll normally let our personal guitars finished in nitro hang for up to a month before buffing. The extra time is rewarded in a finish with extra hardness and shine. Next up -- buff it out!
|
|
||
|
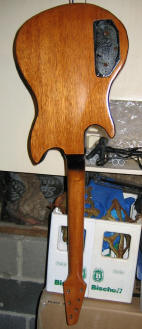
Click here to see what it looks like after buffing. |
|||
| Page 1, Page 2, Page 3,
Page 4 |
|||
| ATTACK HOME BUILDER'S GALLERY | ||||||||||||||||||||||||||||||||||||||||||||||||||||
|
||||||||||||||||||||||||||||||||||||||||||||||||||||