|
BUILDING A NEW STRIPED S-STYLE! Page 7 |
|
BUILDING A NEW STRIPED S-STYLE! Page 7 |
| LIGHT UP THE SKY! | |
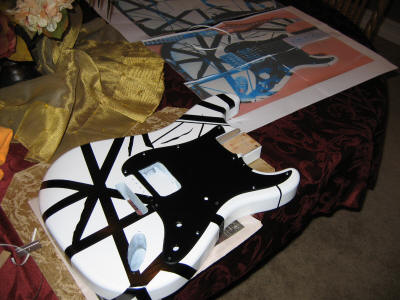
| Pinstripes! If you thought laying out the big stripes is tough, wait until you tackle the pinstripes. They are your standard 1/8" tape pinstripes available from AutoZone or other parts store. How did we do it? Well, back to the templates. While there was a bit of science involved here, a lot of it was just "eye-balling" the stripes until they looked right. Like Chip Foos laying out stripes on a muscle car, we took our time here and made sure the stripes looked as right as we could make them. Here is a shot of the first strips we tackled on the upper and lower horn. Remember -- we may want to make this into a red 5150 in the future! |
|
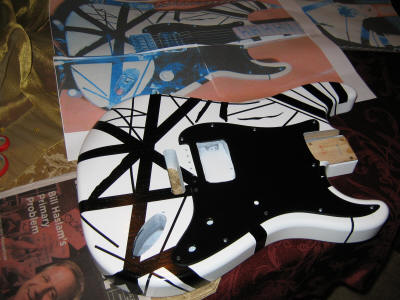
| Stripes Complete The pinstripes were finally complete after literally hours of work. The stripes were tough because they are small and getting the curves right is a painstaking process. Working from photos is also a challenge because the aspect of the photo can really affect the way the stripes appear. Like the Boy Scouts say, "Do your best." There may be some VH snobs out there that say the stripes don't look right. Well -- we don't want to hear from you!
|
|
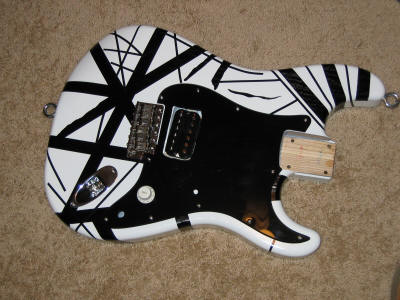
The Body is Complete When the stripes were done we took a well-deserved break! After a day of rest we installed all of the hardware. We took a drive to Home Depot and bought two screw-in hooks (strap buttons!) to attach our strap. Based on the photo, these were about the right size. Tip The ring on the bottom of the guitar is not centered like a regular strap button. It is actually even with the "A" saddle on the bridge. Safety Tip: We checked the pickup for output with an amp and a tuning fork. Don't forget to hook up the ground to the trem claw. |
|
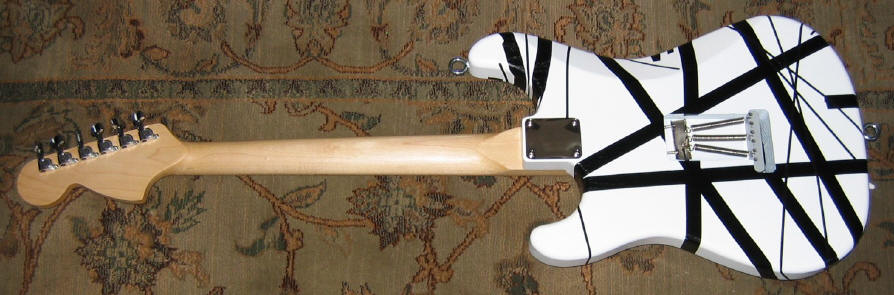
| THE FINAL
PRODUCT! We stripped the neck with some Citrus-Strip. It only had a thin coat of sealer on it and it came right off. We cleaned it with mineral spirits and a Scotchbrite pad. The only safety tip is to keep the stripper away from the position marker dots. It will eat through them quickly! We let the neck sit for a day then reinstalled the nut, the tuners, and the string tree. We stuck the neck on the guitar, installed the strings, and had our guitar! Check out the final photos below. We are happy with how it turned out, and it sounds great. We still need a strap and a Gibson decal on the headstock, but that is all this rig needs now. |
|
|
|
 |
|
Thanks for checking out this build. Keep checking back for updates!
|
|
Back to Page 6 |
|
| ATTACK HOME | BUILDER'S GALLERY | ||||||||||||||||||||||||||||||||||||||||||||||||||||
|
|||||||||||||||||||||||||||||||||||||||||||||||||||||