|
|
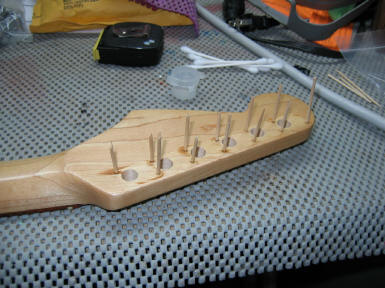
| As we said on page 1, there
had to be some work on the neck. After we stained the fingerboard, we
went to work on the tuners. Here is a shot of our filling the holes
from the old tuners. We knew that the new tuners would cover the
holes...except for one! The only problem with this
is that the endgrain of the toothpicks makes a "different" looking grain on
the headstock. The fills are pretty evident with a clear finish.
We will try to camouflage it with wood filler.
These toothpicks are super glued into the holes.
Once the glue was dry, we cut the toothpicks flush with the headstock.
We took a punch, pressed a little detent into the toothpick, and covered it
with wood filler. Why not do the whole thing with filler? Filler
will shrink over time and sink into the hole, and the toothpicks won't! |
|
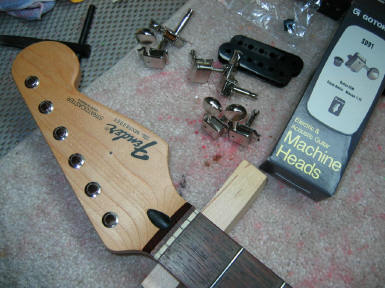
| We scored some Gotoh
vintage-style tuners on eBay because the tuners on the Strat were very
second tier both from a mechanical and visual perspective. We pushed the bushings into the tuner
holes. We had to slightly enlarge the holes with a reamer to get them
to fit snuggly.
Safety Tip: Make sure you get the tuners aligned
and fitted prior to finishing the neck with lacquer. The frustration
of trying to fit tuners while saving that shiny finish is almost too much to
take!
|
|
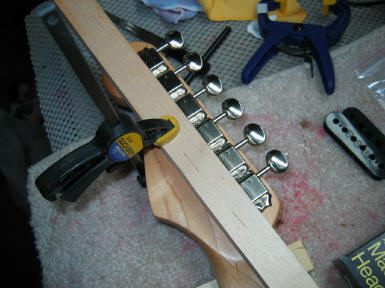
| Once the bushings were in,
we turned the neck over and put the tuners in place. There are seven
screw holes required, and it is critical that you get these tuners lined up
properly. This style of tuner is very susceptible to getting "out of
line" so care is required! Using a piece of
maple which had a flat side, we aligned the flat side against the tuners and
clamped the maple in place.
Once the tuners were in place, we marked the position of
the holes with a fine point Sharpie marker.
|
 |
|
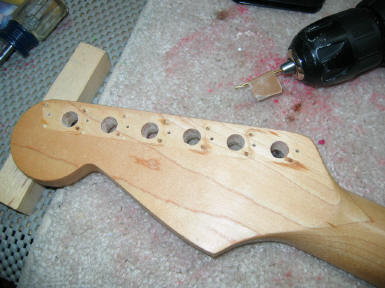
Once marked, we removed the tuners. We took a punch
and made a pilot hole for each hole. Once we were convinced it was
lined up properly, we drilled the holes (we checked the alignment with a
steel ruler). Here you can see the drilled
holes, and the filled "former" tuner holes. Luckily, only
one "filled" hole will be visible under the new tuners. You can see the drill in the back with a 1/16" bit and
a tape depth stop. We measured how long the screw would be and taped
the bit to make a little flag. When the flag hits the headstock, it is
time to stop drilling!
We taped the fingerboard and sprayed the neck with
several coats of MinWax gloss lacquer. Yes, we sprayed right over the
original finish, and it was much easier than stripping the neck! |
|
|
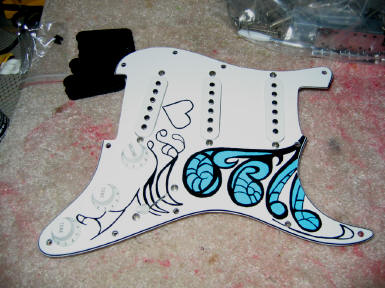
While the lacquer on the neck dried we put the controls and the
pickups into the painted pickguard. Be careful not to scratch the
paint! Safety Tip: If you are going to try
a project like this, make sure your pickups and controls fit into the new
pickguard. There are some pretty wide variances out there,
particularly with the number of products coming from Asia!
Finally, we buffed out the neck and installed the parts, including
a new string tree. |
|
|
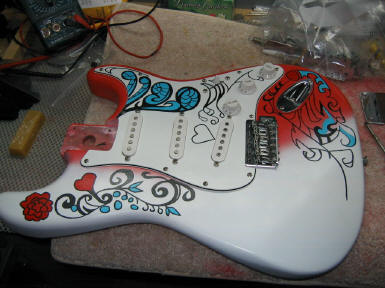
With the neck complete we started assembly on the body,
and worked carefully to avoid and "oops" with the screwdriver. We
protected the artwork with pieces of a brown paper bag while attaching the
pickguard. Note the bar of beeswax to the left
of the body. Beeswax is a great product and can really help when
putting a guitar together. We use it to lubricate screws -- just rub
the threads across the bar. The wax makes it easier to screw in, and
it also helps seal the cavity.
This one is about ready for the neck...it is starting
to look like a guitar! |
 |
| Next up...The
Final Product |
|
| |
|
Back to Page 4, Go to
Page 6 |
Back to Top |
