|
|
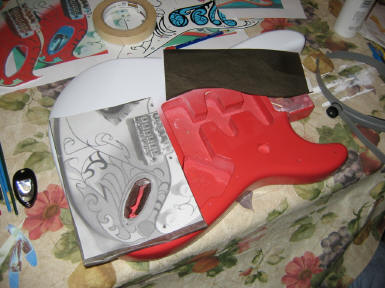
| Once we started working with
the rear template, it became clear that some of the lines were hard to see
because of the contrast of the colors. We reprinted the lower template
in black and white to make tracing the design much easier. Here is a shot of the body
with the carbon paper in place. We are tracing the lines just like we
did with the pickguard. Once were happy with the alignment we
taped the templates down with drafting tape. Drafting tape, made by
3m, looks like masking
tape, but it is low tack and won't lift the paint. You can get it at
Michael's and Hobby Lobby.
Safety Tip: Take your time with the tracing.
Any missteps here will manifest themselves in the final painting!
|
|
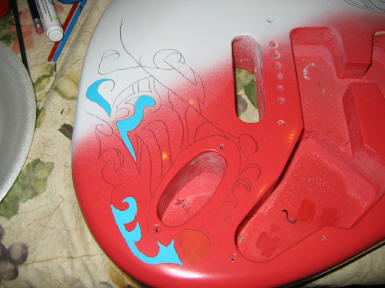
| After some careful tracing
we finally got the lines transferred to the body. When taping the
templates, we left one side open so we could lift the template and look
under it. The reason? To ensure that we had traced all of the
lines. Use a pencil for this maneuver. A
felt tip pen or marker will not provide a clean transfer.
Click on the photo to see it full size!
|
 |
|
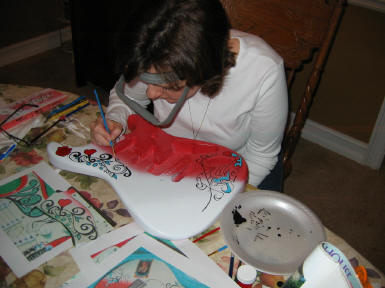
Getting the paintbrush and the palette back
out, Michele starts the long process of painting the graphics on the guitar
using the same paint she used on the pickguard.
Here is a shot of the lower bout of the body with the
turquoise designs and the red "heart" painted. We tried several
different shades of red to get some contrast with the Fiesta Red. We
finally settled on one called "red"! Had we used the
original Rustoleum red this would have been difficult because it was so red.
Safety Tip: Make sure you use a piece of notebook
paper to "guard" the lines while you are painting. The carbon paper
lines will rub off if you run your arm across them.
|
|
|
Here is Michele completing the paint on the guitar body.
Yes, it is harder than it looks! Using the
graphics originally used as the templates as guides, she painted the graphics by
hand...using a real brush and real paint.
This took much longer than we had originally
calculated, but it turned out really great.
|
|
|
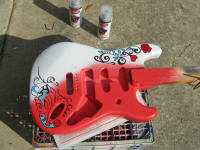
Here is the body with its graphics. Click on the photo to
see it full size. We sprayed Krylon acrylic
over the painted graphics to protect them. We used the "satin" on the upper horn and middle to
match the flat white paint, and we used gloss over the lower bout
corresponding with the Fiesta Red paint.
|
 |
| Next up...Finish
the Neck! |
|
| |
|
Back to
Page 3, Go to Page 5 |
Back to Top |

