|
|
Step 4. Prep the
Body for Graphics
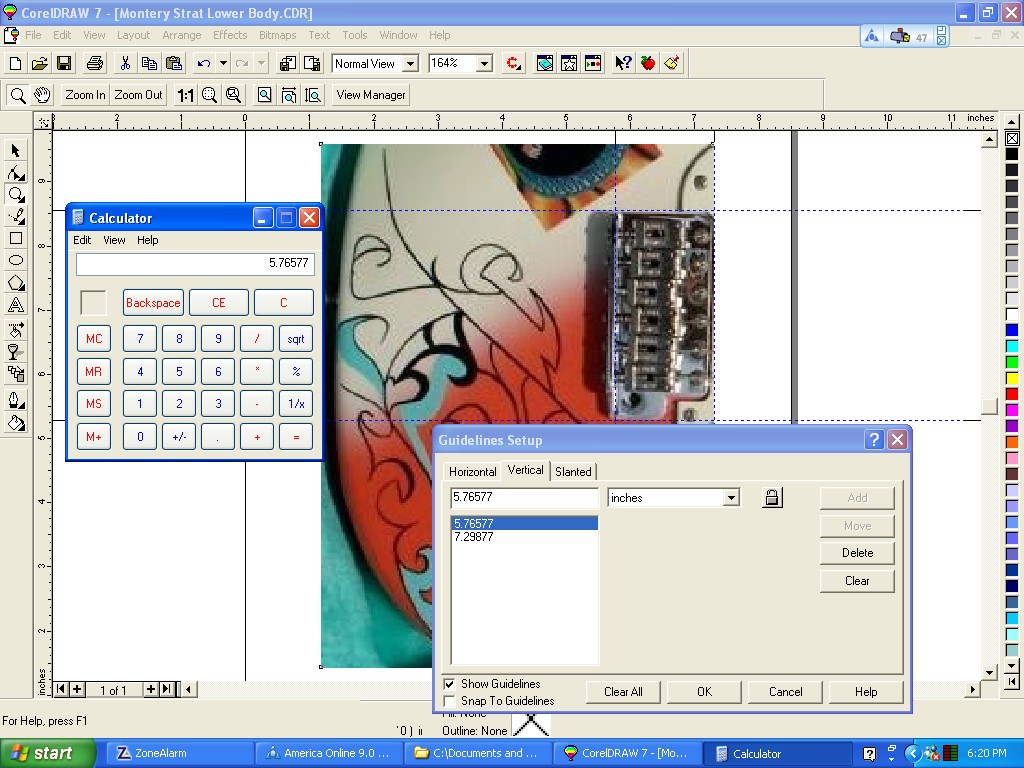
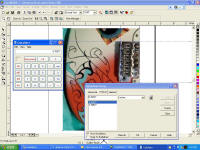
How did we scale the graphics to fit the guitar?
Easy...we measured the bridge, and transferred those measurements to guide
lines (the blue horizontal and vertical lines) in CorelDraw. Once the
guides were set, we dragged the picture until the bridge in the graphic was
lined up with the guides. This insured we had the graphic scaled 1:1.
By the way -- This is CorelDraw Version 7, and old
school version, but it is really great and easy to use. Please don't
ask to us to send you the graphics!
Here is a screen shot of our CorelDraw graphics. Click the photo to see it full size. |
 |
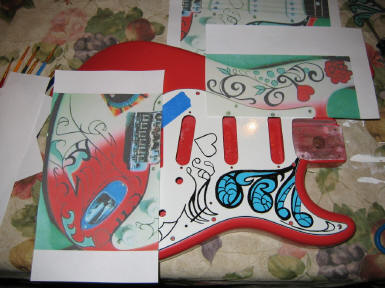
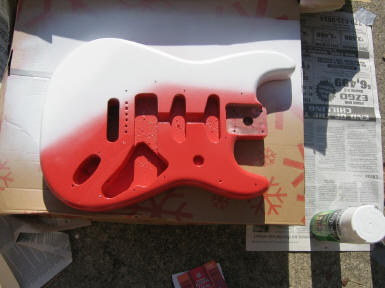
| After about a week of drying
time for the Fiesta Red paint, we decided it was time to paint the white
"swath" on the Strat. Using our templates from CorelDraw, we cut out
the top and back patterns and aligned them to the guitar body.
The photo on the right shows the alignment. Our
concern was to get the proper angle for the white swath, and to avoid a
bunch of overspray on the rest of the red paint.
You can see the blue tape on the upper left side of
the pickguard. This is generally where the white meets the red and it
shows our angle. |
|
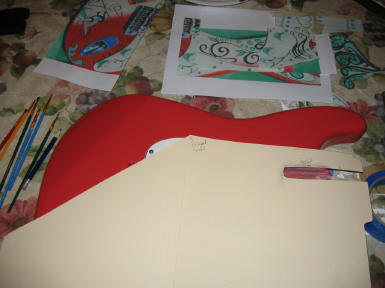
| Using a plain manila folder,
we made a template for the white paint. The position of the neck
cavity is cut into the template, while the position of the upper pickguard
screw is marked with a pencil. We don't want an
airbrushed, precision transition zone on this guitar. We want the
transition to be made with a paint can, just like Mr. Hendrix did.
The plan is to loft the template up about 1/4" so that
the line along the transition is not to clean. If it is too clean, it
will look like it was masked with tape. Use some stacks of cardboard
box material
to lift the template up.
Out to the driveway we go with our paint cans! |
 |
|
First, we wiped the body with naphtha to insure our
fingerprints wouldn't lift the paint. Then, using our trusty Rustoleum
white Specialty Lacquer (bought when we got the original red), we sprayed a
thin layer along the top to double ensure that the red paint wouldn't lift
(we'd already tested on scrap).
We worked our way down, then put the template on the
guitar. Once the template was in place, we sprayed the rest of the
transition zone. There is really no way to
describe this process. It is much like spraying a sunburst with a Home
Depot-level spray can. We always recommend practicing on scrap if you
want to give this a try! |
 |
| That white is bright!
Here is the finished body with the hanging stick in place. We sprayed
the edges and got some cool overspray on the "comfort contour" on the back
of the guitar. Overall, it looks pretty cool.
We may have to clean up the transition with a little rubbing compound, but
overall we are ready to go with the art.
Safety Tip: Take your time here. Some
sloppy spray work will ruin that cool Fiesta Red paint! Always
practice!
|
 |
|
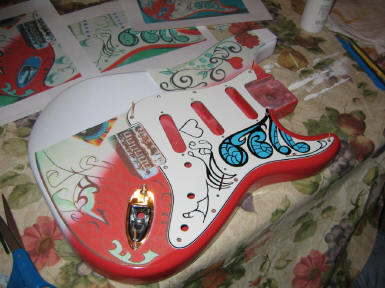
Step 5. Transfer the graphics to the
body. Using the same upper and lower templates, we aligned
them to the guitar using the pickguard. Note the toothpicks holding
the pickguard in place -- very high tech.
Also
note that the jack
plate is in place. This is very important because Mr. Hendrix painted
some lines around the plate. |
 |
| |
|
Back to Page 2, Go to
Page 4 |
Back to Top |