|
BUILDING A RELIC T-STYLE! |
|
|
BUILDING A RELIC T-STYLE! |
| Mr. KK, owner/operator of KK Music in Tullahoma, Tennessee, threw down a challenge for a special Guitarattack Guitar. "Take this kit and make something out of it", he said. Well, we like guidance like that. Here is how it went down.... | ||
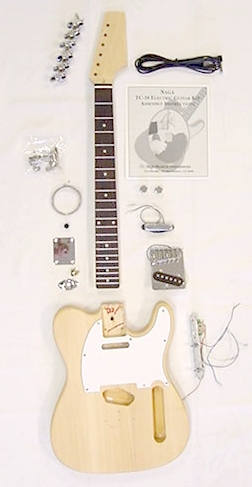
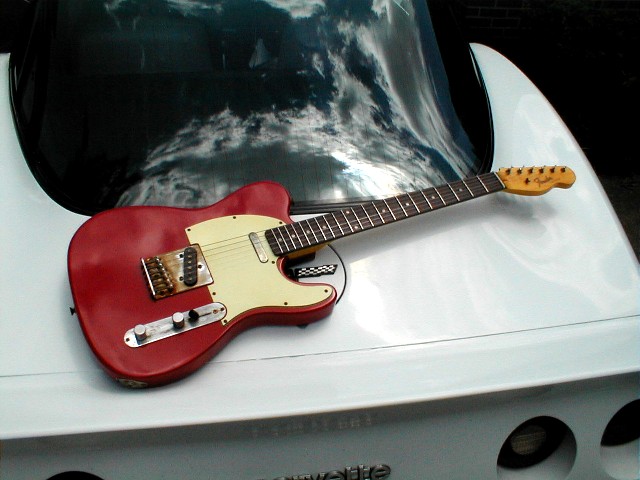
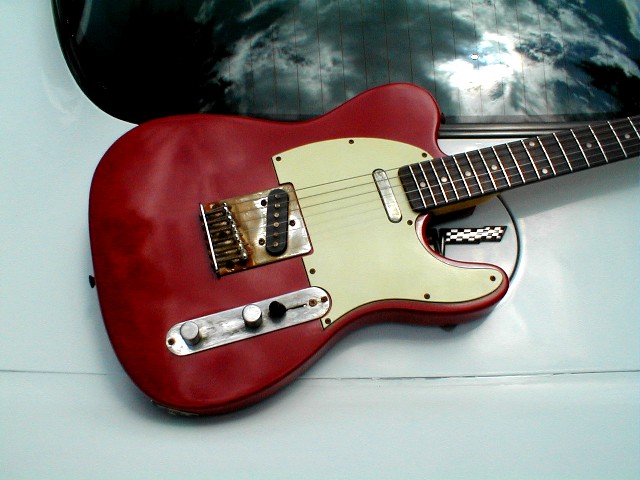
| The Saga T-Style Kit. Much like the Mattocaster, you can get these on eBay from the seller onlineguitar for about $100 with shipping. A true gem...everything you need to build a guitar. Note: Structurally this kit is pretty close to a real Tele. However, the back has a cutaway much like a Strat, and the strings do not go through the body -- they mount to the bridge. Our first step was to complete an inventory. Everything is there -- time to start! We decided to make this a relic-looking guitar that would have some of the characteristics of Muddy Water's Tele. Dakota Red...that's the ticket. We've also decided to string it up and play it for a while before we relic it too hard. You have to ensure the lacquer is good and dry before the distressing takes place (in our opinion).
|
|
|
| Step 1:
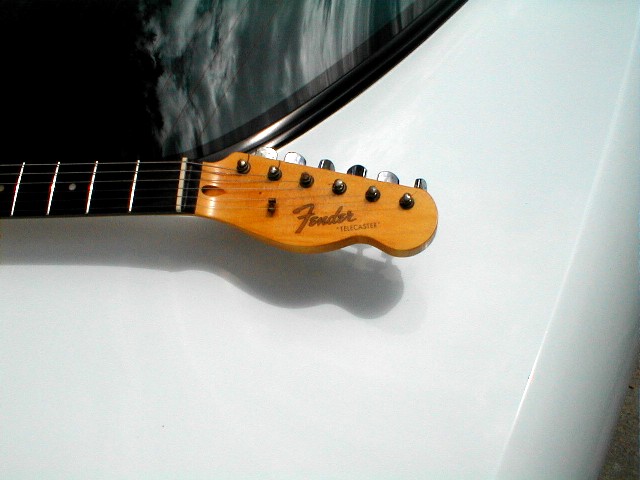
Finish the Neck We didn't want to try anything particularly new on this guitar, so we finished the neck just like we did on the Mattocaster. We cut the shape of the headstock into the Saga neck, and applied an "eBay Special" decal on it. The finish is ReRanch neck amber and satin clearcoat. This guitar is for personal use...we don't sell Saga guitars disguised as Fenders! IMPORTANT NOTE: I would not buy a "vintage" guitar on eBay for any amount of money! The fakes are too convincing. Get the emotions going and you'll charge just about anything on that MasterCard or PayPal.
|
|
|
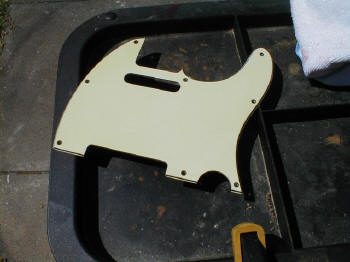
| Step 2:
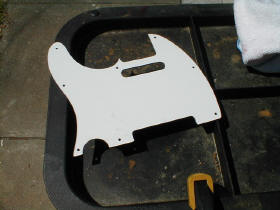
Fix the Pickguard Old guitars don't have nice, clean pickguards. We had to age this one appropriately. The photo on the left shows what it looked like...ultra white...almost sterile. The photo on the right shows the final product...I may post the technique soon...keep checking back.
|
 |
|
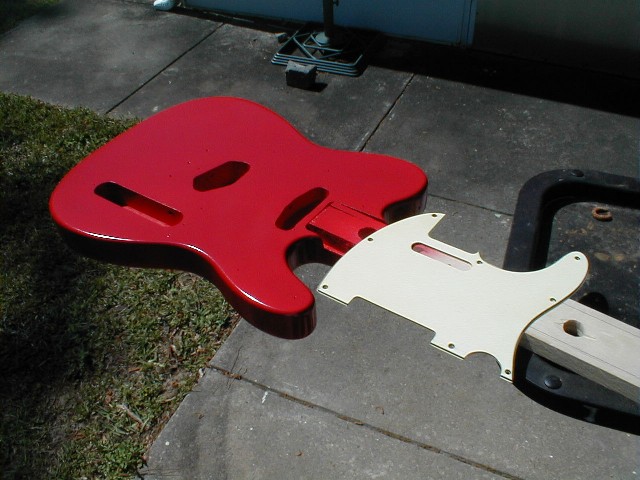
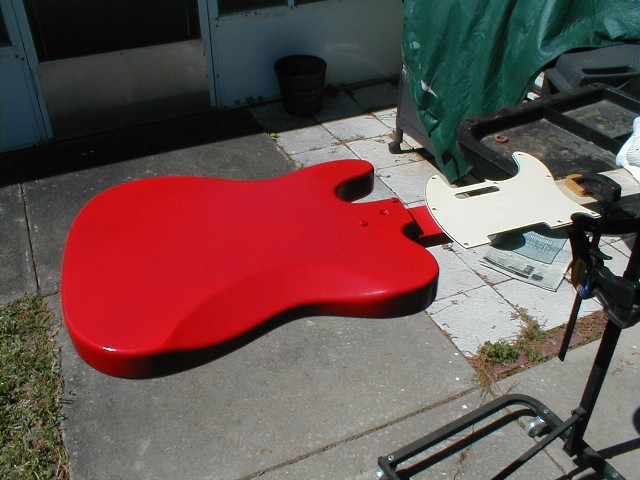
| Step 3: Paint the Body We prepped the body like the Mattocaster, using BINS as a primer, then spraying ReRanch Dakota Red. The body had a lot of sealer on it, and we stripped and sanded most of it off. It was particularly tough -- not sure what it was, but the five to six piece body probably needed it! Here are some shots of the body with just the color coats, and the aged pickguard for a "preview". The real Teles painted this color did not have a clear coat. We'll probably forego the clear coat, also...we don't want the yellowing on top of the red.
|
|
|
|
||
| Step 4: Age the Hardware and Put It Together We're not quite ready to tip our hand on our hardware aging strategy, but have a look for yourself...we think it works pretty well and looks convincing. Once we buffed out the body like the Mattocaster we grabbed a screwdriver and put the guitar together. Instructions are included -- we just had to clean up some solder joints. Now we wait for the lacquer to cure. We figure around the 4th of July, 2004 the body will be ready for distressing. That is code for beating it up! Keep checking back, and remember -- be careful what you buy on eBay!
Update: As we continue to play this guitar, we can't believe how great it sounds. This may sound like folklore or urban legend, but we honestly believe that getting the thick sealer off of the guitar body and neck and finishing it with nitro lacquer makes a significant difference in the tone. Also at work is a good fret job and a good setup. Keep checking back! |
 |
|
 |
||
 |
||
| On to Page 2 | ||
| ATTACK HOME | BUILDER'S GALLERY | ||||||||||||||||||||||||||||||||||||||||||||||||||||
|
|||||||||||||||||||||||||||||||||||||||||||||||||||||