|
The Spare Parts Les Paul |
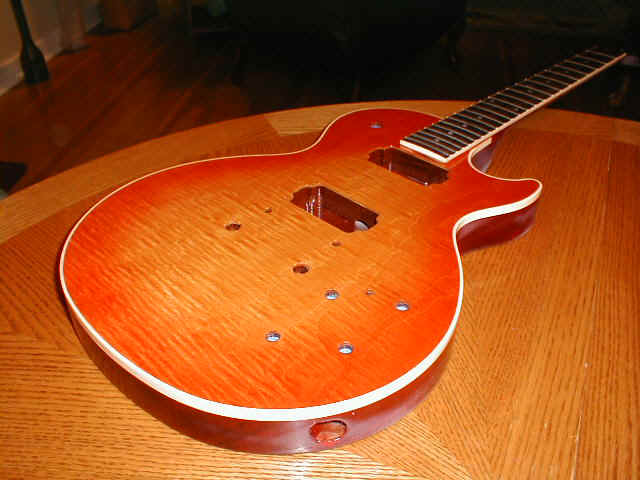
| We sprayed some red shader around the edges of the guitar with our trusty airbrush and were able to even out the sunburst. While it is very subtle, the red helped define the burst a little more, and wound up being pretty pleasing. We locked the burst with some clear, and decided to move on to the headstock.
|
|
|
|
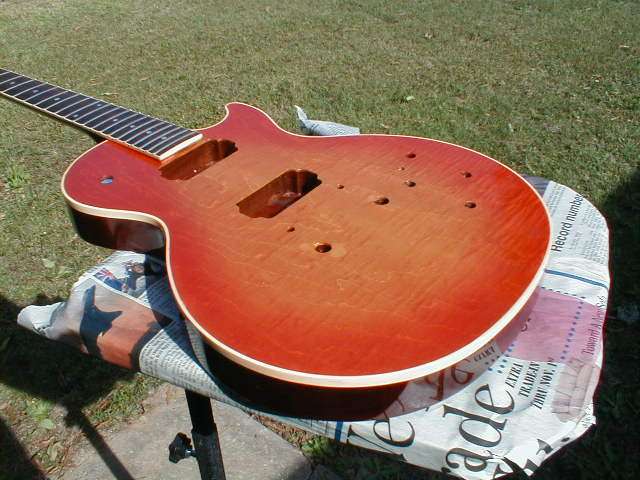
| For a better look at the sunburst,
here are a couple of photos taken outside in the sunlight. The key to getting the good figure, in our collective opinion, is the fact that we stained the bare wood prior to spraying the sunburst. The flame really jumps out, and this is not a "AAAAA Killer Top" by any stretch of the imagination.
|
|
|
|
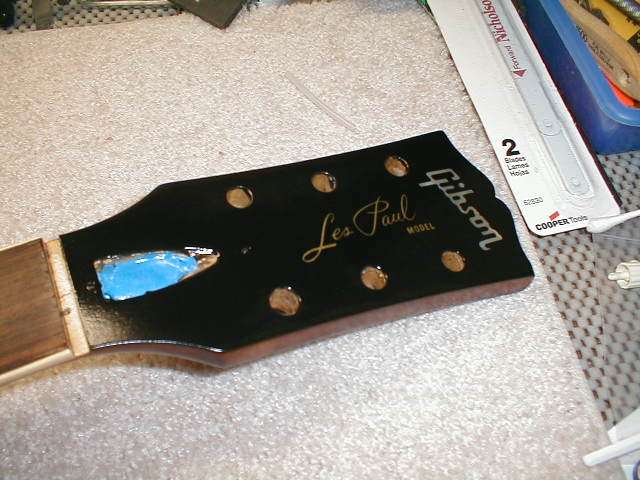
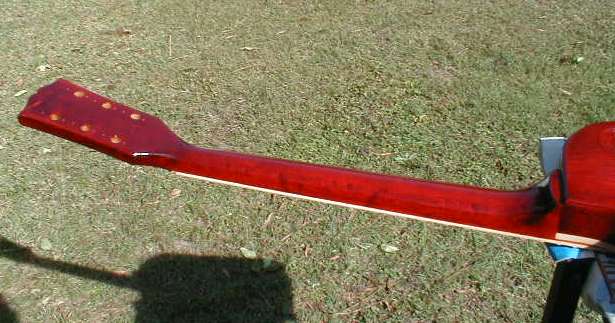
| Back in the old days (pre-renewal every year,
$10k in new inventory, etc..), KK's used to be a Gibson guitar dealer. Along with
the guitars came a bunch of parts. Among these parts we found some old NOS Les Paul
decals. Here is a shot of the LP's headstock with one of the decals installed...very
nice. Click it to see it full-sized. Now for the rest of the story. We figured the decal was at least 20 years old and would work just great. We scored two decals with MODEL on them, along with a SPECIAL, and a JUNIOR. This guitar would receive a MODEL decal. We got the guitar prepped, got our dish of water, Microsol decal fixant, foam tweezers, and some paper towels. We put the decal in the water, and it absolutely disintegrated! The film just fell completely apart! eBay alert -- that old decal may fall apart on you. Now that the cunning plan was falling apart, we thought, "what the hey" and decided to try another one. We decided to exercise a little more care, if that was possible. Taking our time -- code for about an hour and a half -- we got the decal lined up and placed on the headstock. The decal was in about 20 pieces -- some extremely small -- but the magnifier loop and plenty of light helped us to get the decal on. We decided to give the original decal a go because the gold looked so great..and it was an "original." Once the decal dried for 24 hours, we sprayed it with some mist coats of lacquer, let them dry thoroughly, and then sprayed some heavier coats. Whew -- steady on this one. This is one step not to rush. |
|
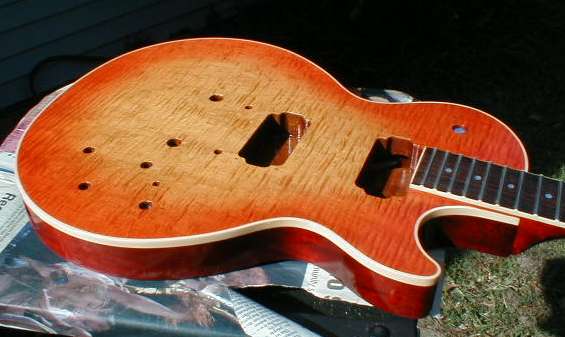
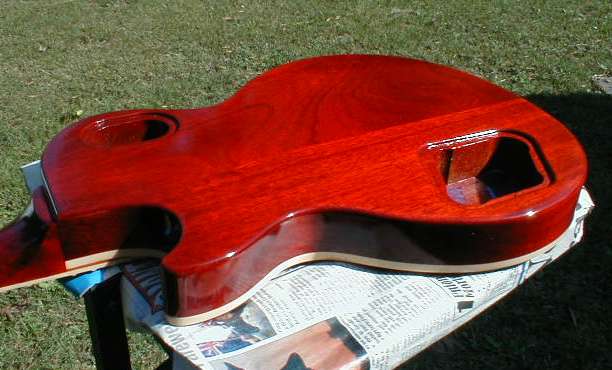
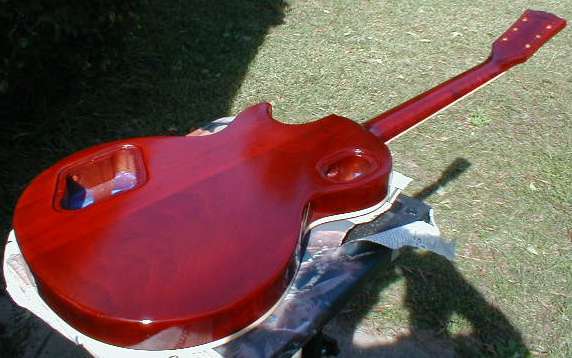
| The ReRanch Heritage Cherry nitro
lacquer is just beautiful. Here are some shots of the guitar's back that show how
great the color is on the mahogany body and the stained maple neck. We taped the
binding with low-tack 3M masking tape, and left a little ridge on the binding side.
This allowed us to scrape the binding and ensure that we had a crisp line against the wood
of the body. We've tried taping binding to get a perfect, "no scrape"
edge, but have been unsuccessful so far! The key in this step is to ensure that you get that binding completely clean prior to spraying any clear coats. We found that if we completed this over two or three days (remember -- part time guitar builders), that we would still find little specks of the cherry stain on the binding. By the way -- we think the maple neck looks great. Remember -- we stained the bare wood, locked it with clear, then sprayed the Heritage Cherry on top of the clear. |
|
|
|
|
|
| Now that the top is looking better, the back and neck are done, and the headstock is ready to go, we are going to finish spraying clearcoats. Keep checking back for our buffout (hopefully around Christmas 2003) and the final assembly. Again, we believe this is going to be a great looking guitar, and beware of what you buy on eBay.
|
|
| Page 1, Page 2, Page 3, Page 5, Page 6 | |
| ATTACK HOME | BUILDER'S GALLERY | ||||||||||||||||||||||||||||||||||||||||||||||||||||
|
|||||||||||||||||||||||||||||||||||||||||||||||||||||