|
Page 5 |
|
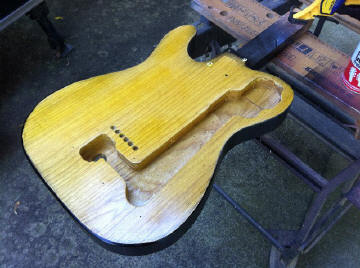
The Guitar Attack B-Bender T-Style! Step one was pretty easy. We taped off the top and sprayed the sides with black acrylic lacquer. We used Duplicolor Classic Lacquer from Autozone. It is pretty cheap, is compatible with nitro lacquer, and was available when we needed it. After the black was dry we sprayed the first coats of "Vintage Amber" from StewMac. Well, it looked pretty yellow, but we continued. |
 |
|
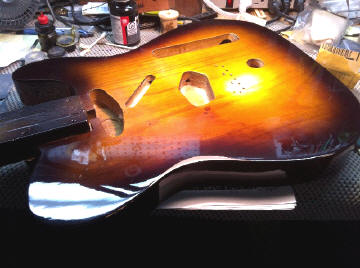
Here is a shot of the back with the first coats of vintage amber. You can see the bender cavity in this shot -- pretty invasive. Believe it -- we somehow knew that this amber was way more yellow that we had expected. |
|
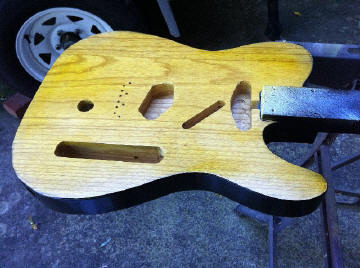
| Using the StewMac Tobacco
Brown nitro we sprayed the dark band of the sunburst -- and we knew it
wasn't going to work. The center of the sunburst was way to yellow and the brown was very coarse looking. Back to the drawing board. We stripped the body and started over. |
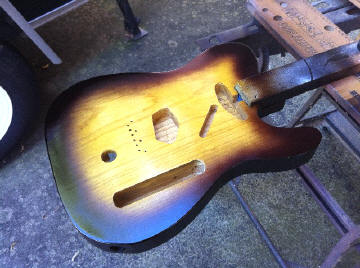 |
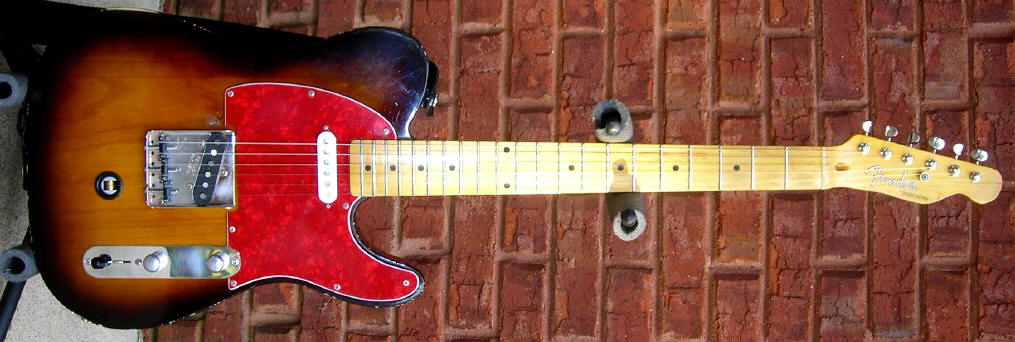
| We got out the TransTint dyes and started mixing brown and amber. The amber is way to yellow by itself, but after experimenting we came up with a concoction suitable for spraying with a PreVal sprayer. Yes, this process can be very frustrating and there is much trial and error. However, getting a good base is critical for a good sunburst. Once the base was done, we sprayed a couple of thin coats of clear nitro lacquer. Next, we sprayed the burst with an airbrush -- both front and back -- and made sure the sunburst spray was very fine. We used a very dark brown lacquer shader for the burst and it blended well with the black sides. You be the judge -- we believe this finish with the white pickguard is superior to the "burst" above. Note: We were going to use the white pickguard with a custom-wound neck pickup, but we broke the pickup installing it into the body. One slip with a screwdriver ruined the pickup. We decided to go with the red pickguard with one of our custom-wound Strat pickups in the neck position. The white pickguard will probably be installed later when the pickup is repaired. |
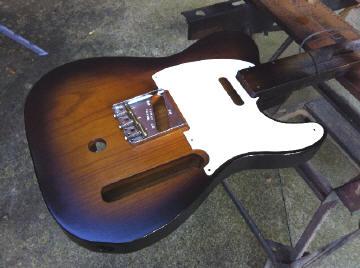 |
| We let it dry for a couple of
days and sprayed a couple of coats of clear nitro lacquer. Yes -- we
used Minwax spray cans -- the black ones -- to get the clear on the guitar. We only let it dry for four days before we buffed -- we want a relic look -- but it buffed out beautifully. Two tips: 1. Do not make your finish too thick -- it will crack and we think it affects the tone. 2. We recommend letting the clear dry for at least a week before you buff. |
 |
| We let the body
sit for a few days after buffing and we started putting it together.
The finished guitar is shown below. We flipped the control plate --
our favorite, and installed our custom-wound pickups. The guitar
sounds awesome, and there are some special features in the pickups. We
did some light relicing on the body and neck to cover some of the defects in
the body. |
|
 |
|
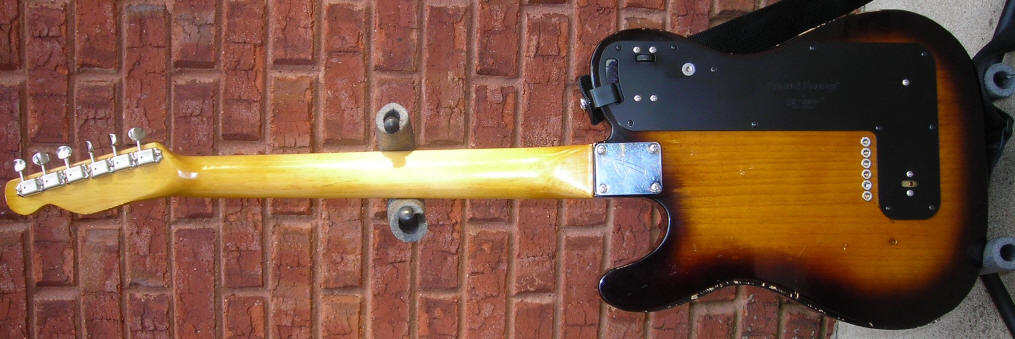
| Here is a shot of the back. You can see the vintage-style tuners, the burst finsh, and the bender assembly. | |
 |
|
| Well,
it plays and sounds great. It turned-out great, and it has become of
our favorites. The tone is fantastic for "chicken pickin", and the bender is really cool.
Keep checking back for some sound clips and more work on the T-Style! |
|
Back to Page 4 / Back to Page 1 |
|
| ATTACK HOME | "BUILDER'S GALLERY" | ||||||||||||||||||||||||||||||||||||||||||||||||||||
|
|||||||||||||||||||||||||||||||||||||||||||||||||||||