|
Page 3 |
|
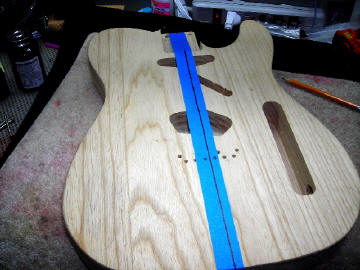
Step 3: Route the Body With the neck complete, the next step is to route the body. The first step is to find the center of the body. We bolted the neck to the body and aligned it like we had in Step 1. Using some blue 3M masking tape, we marked the center point of the body. We also used our trusty Black and Decker "laser level" to find the center. Not only is center critical, but also the lay of the B String. Do not hurry this step. If you get this wrong, it will all be wrong! |
 |
|
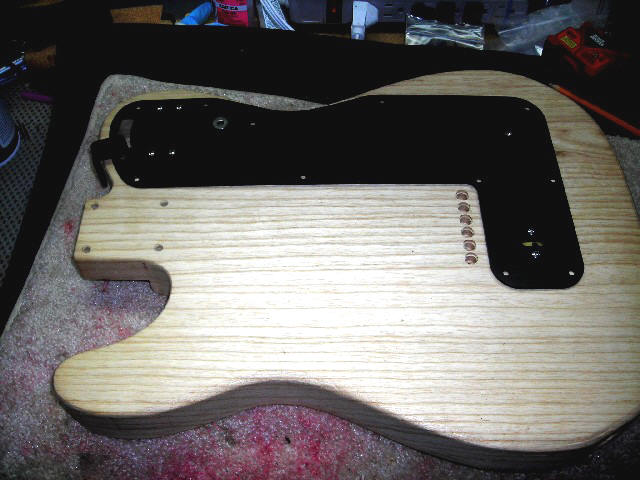
Here is a shot of the front of the guitar with the bender assembly arrayed on top. The key here it to align the bender assembly which sticks out of the top of the guitar. You can see the center line marked, the B-string line marked, and the general position of the bender assembly. This step is documented in the instructions which come with the bender. We drilled a 15/16" hole completely through the body with our drill press. This is critical for alignment of the assembly. TAKE YOUR TIME! |
|
|
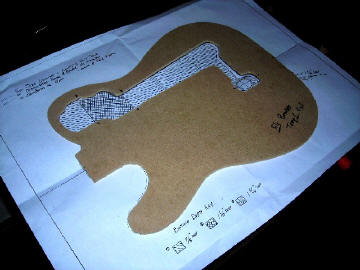
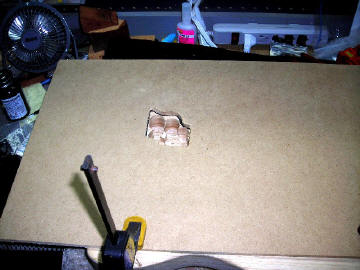
Here is a template we cut out of 1/4" MDF from Home Depot. We cut the bender cavity out of the template to help us align the area to cut. This is a critical step because
it is difficult to transfer the dimensions of the paper template onto the
body. |
 |
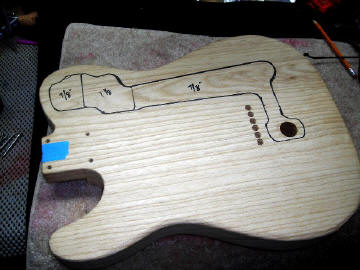
| Using the MDF template, we marked
the "route areas" on the body with a fine-point Sharpie. You can see that part of the cavity is 7/8"
deep, while the center portion is 1 1/8" deep. Remember -- a typical Tele is 1 3/4" thick. You can see the 15/16" hole we drilled through the body with the Forstner bit. |
 |
| Using a Forstner Bit chucked into the drill press, we started hogging the wood out of the cavity areas. This will make the routing much easier. | 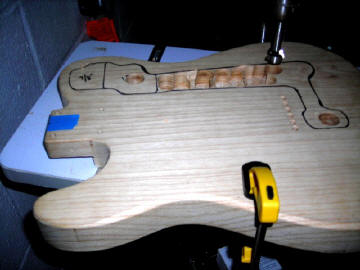 |
| Next up -- route to exact
depth and dimensions. Here is the template we make for the center 1
1/8" portion of the cavity. Using the marks we made earlier, we
aligned the template, clamped the template and body in place, and routed to
depth with a flush cut bit. There are two templates here. We routed the deepest portion first to ensure that the 1 1/8" part of the cavity was the proper depth and aligned per the template. |
 |
|
|
|
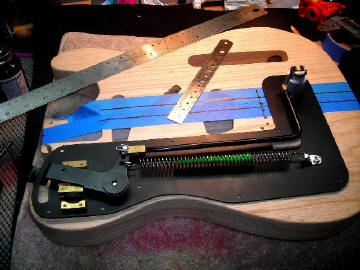
| Once
routing was complete we sat the bender assembly in place to check alignment.
Success! At this point we put the guitar back together and made sure the bender worked properly. We played the guitar acoustically for a few days then decided it was time to move on to the finish. |
|
On to Page 4 /Back to Page 2 /Back to Page 1 |
|
| ATTACK HOME | "BUILDER'S GALLERY" | ||||||||||||||||||||||||||||||||||||||||||||||||||||
|
|||||||||||||||||||||||||||||||||||||||||||||||||||||