|
REPAIRING A RELIC TELECASTER'S NECK! |
|
REPAIRING A RELIC TELECASTER'S NECK! |
| Mr. KK, owner/operator of KK Music in Tullahoma, Tennessee, threw down yet another challenge for GuitarAttack. "This neck's got a hump in it and I can't adjust it...see if you can fix it." Again, we like guidance like that. Here is how it went down.... | |
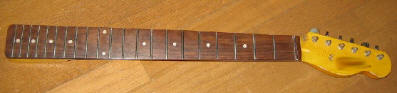
| Here we have a neck from a Saga Tele Kit. The neck has a pretty pronounced hump in the mid-section (between about the 5th and 12th frets). When we say hump we are referring to the center of the neck being higher than its two ends...and having a hump is less than optimal. We examined the neck and decided that we didn't want to remove the fingerboard unless we absolutely had to. A lot of these guitars have some very "difficult to work with" glue holding them together, and that is the last thing we wanted to have to blast our way through! Most of the time heat will work on Gibsons and Fenders. Well...the Saga can be a different animal. We decided that the most likely method for this repair is a refret.
|
|
 |
|
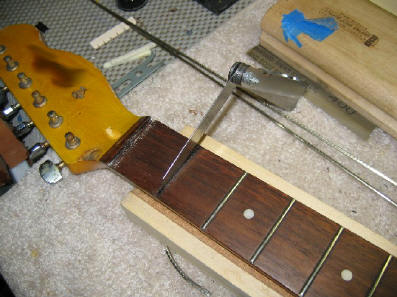
| Step 1:
Diagnose the Problem. After taking a good look at the neck in a variety of lighting conditions, we decided to pull out a fret and take some measurements. Using a feeler gauge, we see that the nut slot is .023", which is about right for the Stew-Mac wire you see behind the neck. The nut had been super-glued into the neck, and I thought we'd never get it out. Safety Tip: Never use super-glue for nuts. I prefer Elmer's white glue because it is much easier to get the nut out in one piece if you ever need to.
|
|
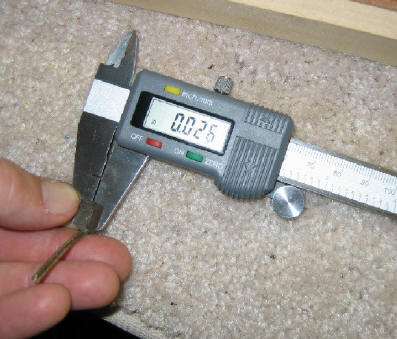
| When we measured the
fretwire we had just pulled out, we initially thought that we had made a
mistake. The wire was a good .003-005" wider than the fret slot in the
fingerboard. Generally, this has the effect of back-bowing a neck because the frets are pushing the fret slots apart all the way down the neck.
|
|
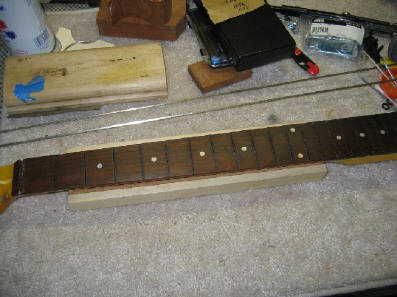
| Step 2: Pull the Frets After the shock of seeing the mismatch between the fret wire and fret slot, we decided we had to do a full refret and try to get the neck to settle down. Once we got the frets out, we gave the neck a few passes with a sanding block with a 12" radius. As usual, we use a soldering iron to heat the fret before we pull it, and the frets came out cleanly with very little chipping.
|
|
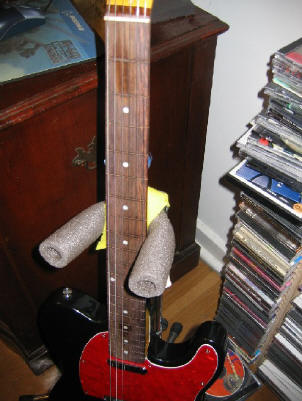
| Step 3: Put the Neck on a Guitar and String 'Er Up What in the world are you doing? A fretless Tele? We had to get some tension back on the neck to see what the neck would do with strings pulling on it. We slapped it on our black Saga development guitar and strung it up with 9's. Not surprisingly, the neck straightened out nicely with no frets, so it appears that the fret wire was a big part of the problem. Note the shiny spots on the fingerboard. These
are low spots. Also be advised that there was still a little bit of a
hump between the 5th and 12th frets on the Low E side that we'd have to
work. The High E side of the neck looked pretty good, so the next order of business would be to get the neck ready to refret. Were going to do some fingerboard shaping and restain the Saga "rosewood" prior to fretting. We also want the position markers to look more like "clay", or Ivorite markers instead of the bright "mother of toilet seat" markers visible here. |
|
| On to Page 2 | |
| ATTACK HOME | REPAIR MAIN | ||||||||||||||||||||||||||||||||||||||||||||||||||||
|
|||||||||||||||||||||||||||||||||||||||||||||||||||||