|
| Note from
GuitarAttack: This is a great story. Lots of great
techniques, even if it isn't a real Saga! These are plentiful on
eBay...check them out. Key tip: Always test paint on scrap!
From
Simon GIbson |
|
|
|
|
| My top tip would be my test piece. Once I had the kit and knew that I
would be building and painting it I dug out an old piece of offcut wood
and used it to practice shaping the head the way I wanted and the paint
style I intended to use.
This turned out to be a fantastic thing to do, because I made virtually all my mistakes there and painting the guitar was much easier and less stressful as a result. These included discovering the making tape I used allowed too much bleed through at the edges or stained the white, so I bought more expensive tape. Or that sanding between coats and buffing the finish at the end was far beyond my level of competence and ended up giving a worse finish for me than just taking my time with the spraying. I’m not a perfectionist so am happy for the finish of the guitar to have a bit of ‘character’. Or that the Lacquer used would cause a Sharpie to run, so I couldn’t write on it anywhere I intended to lacquer. |
|
|
|
|
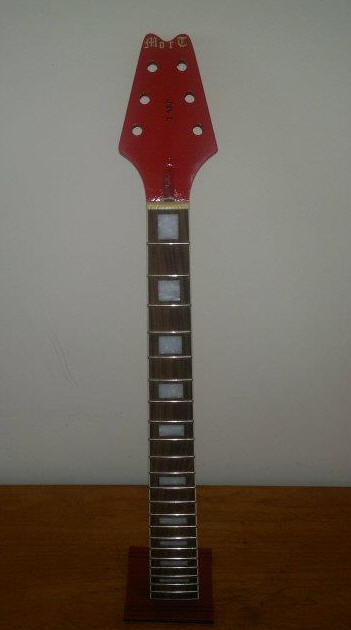
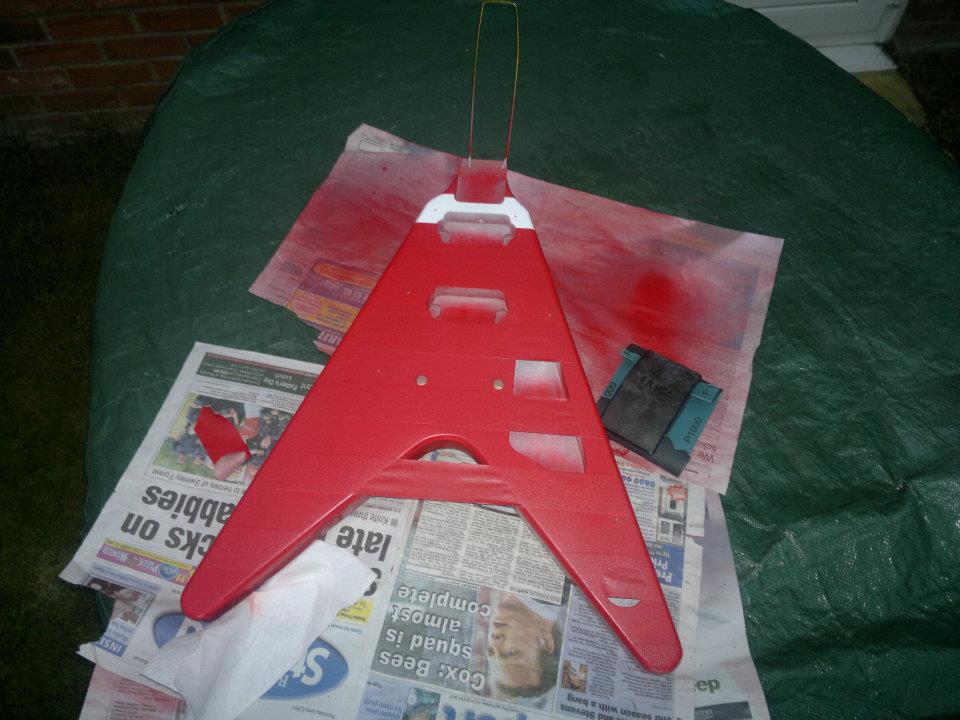
| Having taken
the guitar apart again I primed and painted the body and neck. I bought
some generic spray car primer, paint and lacquer from a national store
chain and it seems to have done a respectable job.
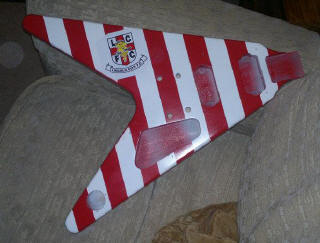
The finish is nowhere near as professional as on my nice guitar, but then you wouldn’t expect that. First I primed and rubbed down the guitar. Then painted the front white as a bed for the stripes, masked off where I wanted the stripes to be and painted the rest red. Everything got a few coats to try and ensure an even finish.
|
|
|
|
|
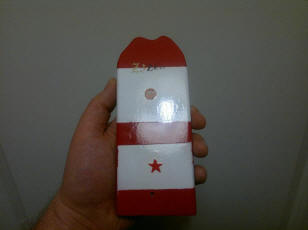
| Once that was dry I took
off the masking tape to reveal the stripes, stuck a window sticker of the
club logo to one of the legs and gave the whole thing a few coats of clear
lacquer. For the neck, after I had shaped the head the way I wanted it, I
just masked off the fret board, painted it red, stuck a name and serial
number on it and then lacquered it.
Really simples stuff, which took me a couple of weeks start to finish.
|
|
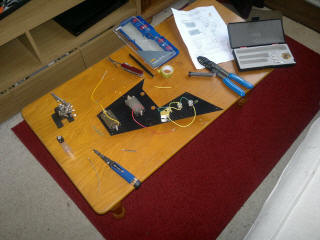
| As for the electronics, the
guitar didn’t come with any wiring (or assembly) instructions but the
Seymour Duncan website has a section with wiring diagrams for seemingly
every conceivable combination of guitar internals, so it was a simple job
of picking the diagram I needed based on the parts I had.
It took an afternoon to solder it all together, but seems to work just
fine. |
|
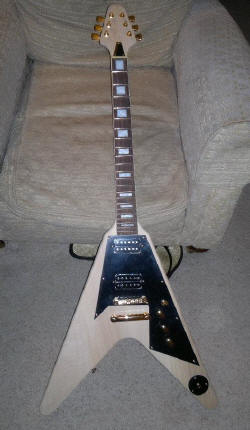
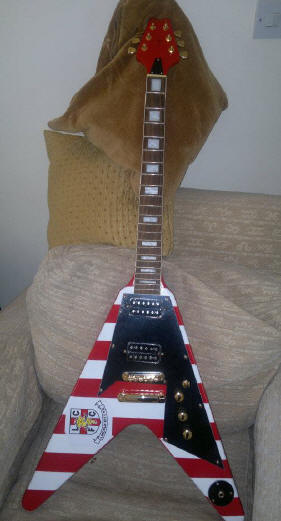
| Finally it was time to put all the pieces together, string it up, plug it
in and see what I had created. Astonishingly, it was really rather nice to
play (I would describe it as charming, and acknowledge that I’m biased),
although the top E string touches the first fret. I know someone who is
experienced with setting up guitars, so before I start diving into
adjusting truss rods and filling and refilling nuts I’m going to get him
to cast an eye over it to see why the problem really is. It still needs a bit of set up work, and possibly a look at improving the electronics to reduce the hum, but I'm happy with the results (which is more than can be said about the football team). Lessons learnt would be that I needed to be more patient between coats as rushing it a little has introduced some imperfections, although I tried to leave the guitar for a few hours between coats the lacquer seems to have needed significantly longer, and I probably could have bought a second can of lacquer and given it a few more coats before assembly, to improve the look of the paintwork a little, but I was just too excited to finish it. |
|
|
I love it as much as the expensive guitar (for very different reasons, of course) and if someone out there is reading this and is unsure if they should get a kit then I say go for it! They seem pretty impossible to mess up if you take your time and do a little preparation, and the result is very satisfying. |
|
| Great job, Simon! Thanks for the photos and the great story! | |
| ATTACK HOME | "SAGA SAGAS" MAIN | ||||||||||||||||||||||||||||||||||||||||||||||||||||
|
|||||||||||||||||||||||||||||||||||||||||||||||||||||