|
From GuitarAttack: -- Very cool color! Also,
the link below has about 75 photos of this guitar during the building
process. From Andy Crowder:
Hey guys, I've loved checking out the other "Saga Saga's", so I decided to
share my own story about the Stormcaster!
I was given this S-Style kit for Christmas this past year ('06) by my
parents. I had been wanting one for a while, and was already dreaming of
color schemes in my head. I think they were able to get it for around $80
from an online dealer.
This was my first attempt at building a guitar, so I tried to take my time.
The first thing I did was look through the kit and make sure everything was
there. Sure enough, everything was there, so I decided to start with a
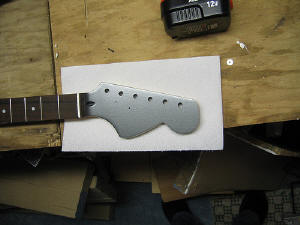
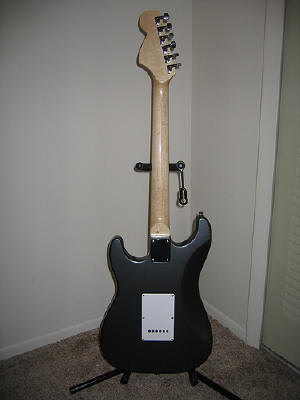
headstock design. It took me a while to get it right, but it's what I
describe as an 'homage' to the 70's style Fender headstock. It's not exact,
but I tried to make it my own. I also decided to paint the headstock to
match the body. After plenty of cutting and sanding, the headstock was done, and I
primed and painted it before I even touched the body. It might sound
terrible, but the headstock was kind of my "experimental" piece, and where I
tested my finishing skills. It turned out good, so I was ready to attack the
body.
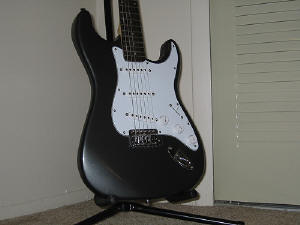
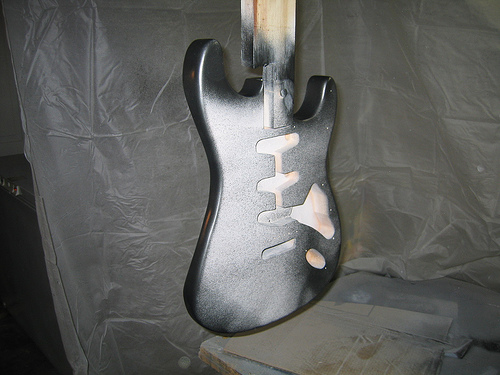
First things first. I picked up some Dupli-Color lacquer paint, and lacquer
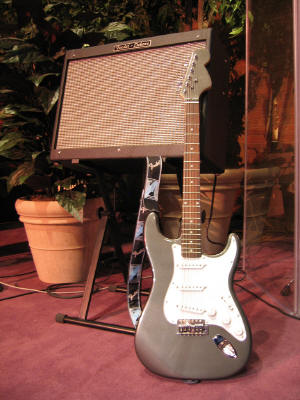
clear. The color I chose is called, "Storm Gray." It's a charcoal type color
and can go from black to silver depending on the lighting, which is very cool. The
first step was to do a light sanding on the body using 600grit
paper. This was to give the primer something to grab onto instead of the
sealer that was already on the body. After that was done, I rigged up a
paint station, and shot the primer. After two coats, I dry sanded it with
800 grit in order to level everything out. There were a few high spots, but
nothing terrible. (Ed. We recommend BINS primer for this. It is
available at Lowe's)
So next was the color. I started with the edges (see one of the pictures),
and worked in from there. I don't even remember how many coats I put on the
guitar, but it was enough to get good coverage and a nice solid looking
finish. Because I'm a novice painter/finisher, I didn't wet-sand the paint
before I clearcoated. Somehow I got in my mind that because it was a
metallic finish, it wouldn't be smart to dull out the paint. I gave the
paint a week to dry before the clear coat, and sprayed 2 cans of clear. It's
a thin finish, but I'm hoping it wears naturally, and looks good. Again, I
waited a while before the next step.
Here's where I really started making mistakes. I went home (where I was
doing the build) early, and couldn't resist putting the guitar together. All
I did here was just follow the instructions provided in the kit in the order
they had them. Everything went together easily except for the tuner
bushings. For this, I took each bushing and heated it up first, then when I
installed it, the paint would soften up enough to allow for a smooth
installation. After everything was together, I strung it up and everything
worked! The sound from the pickups was pretty good, so I didn't worry about
that at all, so I played it as it was for a while.
After a couple weeks, I took it back apart and properly wetsanded the
clearcoat. I wetsanded with 800grit, 1200grit and last was 1500grit. Looking
back, I think it might've been a little overkill, but thats ok. After the
wetsanding, I used some Turtlewax buffing compound, followed by a
wax/polish. Now that I had a better finish, it was time for a proper set up.
The neck was sitting pretty good, so I began with the saddles and
intonation. When that was done, I attacked the nut. It was pre-cut, but was
cut very high and needed to be taken down a lot. I can't afford the
expensive Nut files/saws, so I used very, very, very small drill bits. All I
did was use them as if they were saws, back and forth until everything was
ok.
When all was said and done, the only thing I replaced were the tuners. I'm
very happy with the kit, and extremely happy with the experience I gained in
putting it together. I'm definitely considering getting more of these kits,
and there are plenty of finishing ideas swirling around my brain! So I
didn't just get a guitar kit for Christmas, I got the experience of building
and finishing a guitar and I got a guitar that sounds good! What more could
a guy ask for?
Here is a link to a pretty thorough documentation of the build (plenty more
pictures):
http://www.flickr.com/photos/andy_j_crowder/sets/72157594407162764/
Andy
andrew_j_crowder@cornerstone.edu
|
 |