| Note from
GuitarAttack: This is a great story and there are lots more photos
at the Picasa link below. Scott Crittenden <rsc3e@virginia.edu>
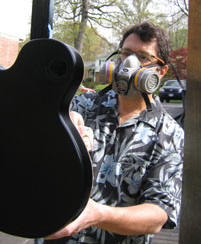
Okay, this is freaky. Since I began my own Les Paul-style Saga kit
back in the winter, two different blue Saga LC-10s have shown up on
Guitar Attack - so hopefully we won't put anyone to sleep with this
one! I used Guitar ReRanch's Lake Placid Blue Metallic (along with
white primer, black, and clear coat) for mine, BTW.
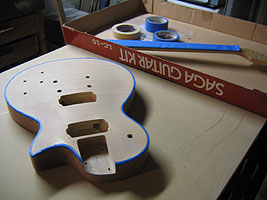
I ordered the kit from Instrument Alley at a reasonable price, got it
quickly and started to work.
The pictures mostly tell the story:
http://picasaweb.google.com/malvolioUVa/GuitarBuild#
By far the most work involved in this project was the painting. After
I built a stand-up frame to hang the wood parts, I masked off the body
binding - a tedious process that took a couple hours. If I'd known I
was going to be masking it again (twice!) I'd probably have given up
then and there. :)
I applied two coats of primer and then moved on to the color coats -
blue on the top and neck, black on the back and headstock - about six
of each color. Then I followed that with eight coats of clear lacquer.
Unfortunately, I didn't sand well enough between coats. I started out
this project with a real phobia about sanding - I figured I would sand
too aggressively and have to repaint, and who wants that? Well, I've
learned that lesson now! - I've got a little orange peel on a few
spots around the guitar. Fortunately it's not too noticeable. (It did
inadvertently produce a weird, not-altogether-unpleasant metal-flake
effect on the black rear surface of the body, under hard buffing. :)
By the time I had applied the last coat of lacquer, I was convinced
that I really needed to follow the ReRanch sanding directions to the
letter - and so I commenced the wet sanding. Here's where I learned
the next lesson: when the directions say "wet" sand, don't get carried
away with the water, already! After wet sanding with 400-, 600-, 800-,1000-, 1200-, 1500-, and 2000-grit paper in quick succession, using
sopping-wet paper, the delicate laminate on the guitar top got soaked,
and swelled into a crack between two of the large mounting holes. Next
time I won't slop so much water, and I'll dry the guitar between
sandings.
After the body spent the night in the shop trash can, I dug it out
again and decided to try a repair. I sanded the crack all the way down
through the laminate, and rebuilt the area with synthetic wood
compound. I followed that with a bit of careful sanding, some primer
on the repaired area, and then some more new coats of Lake Placid Blue
on the whole guitar top - after another complete re-masking (ouch). (I
had pretty much sanded down through the lacquer coats by then, so I
just applied the new blue over the whole thing.)
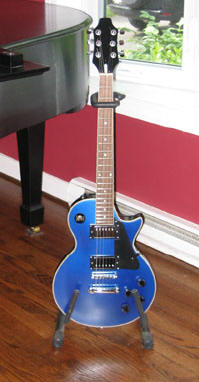
After that, the finishing was pretty uneventful. I buffed out the
clear coats, wired up the rig and applied the shiny bits. I stayed
with all the stock hardware supplied by Saga. The sound is pretty
good, though it's got a bit more hum than I expected. If I start to
play the guitar a lot, I might trade up to some nicer parts, and
shield all the cavities. But for now, I'm getting ready to start my
next Saga kit (also from Instrument Alley) - a Stratocaster.
I always wanted a nice surf-green Strat. :)
|
 |