Special Thanks to Dave Slusser for providing this article.
As a builder of both kit and semi-scratch built guitars, as well as a doing
some repair work, one thing that had bothered me early on was how to remove
a neck for adjustment or minor repair without wasting a good set of strings.
I don’t remember where I got this trick, or when, but it has saved me some
money and aggravation over the years. A lot of you more experienced guys (
and girls ) may already know about this, but then this site is more for the
"newbies" who need help and hopefully I can save someone a buck or two.
When you need to remove the guitar neck, this ONLY applies to guitars with
bolt-on necks.
(Disclaimer ), I don’t need email about how someone tried to follow my
instructions and destroyed a Martin D-45, slacken each tuning machine by one
turn. Now get yourself a capo, stop laughin’...if you’re a guitar player I
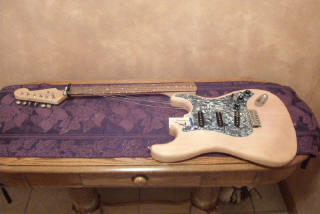
know you have one!Put the capo
as close to the nut as you can get it on the fretboard side. ( top photo )
Don’t be too concerned if it’s not slammed up drum-head tight, just so it’s
close. I prefer a Jim Dunlop lever style capo. That’s the one with the nylon
strap that goes around the neck and the plastic paddle lever that fits into
whichever slot on the back of the capo you want to use. This type lets you
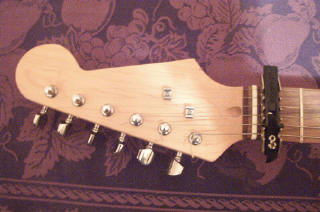
get the capo tight enough for what we’re doing. After that, loosen each
string by 3 turns. That may need to be adjusted depending on what the ratio
on you particular tuning machines is. The capo will keep the strings from
unwinding off the tuning machines while letting you slacken them enough to
remove the neck.
Now just turn the guitar over and remove the
neck bolts, turn it back right-side and remove the neck.( bottom photo) So
as you can see, this will allow you to remove and reinstall the neck as
often as you need to make any repairs or adjustments without ruining a good
set of strings. When you reinstall the neck, just reverse the order of
things. Drop the neck back into the pocket with any shims that came
out, in their proper place, carefully turn the guitar back over and reinsert
and tighten the bolts, flip the guitar back right-side up, tighten the
tuning machines ( just enough to put some tension back in the strings about
two turns ), remove the capo and tune to pitch.
A word of caution: when reinstalling the
neck, be careful NOT to get the strings caught or tangled in the neck pocket
or bridge saddles. Just take your time and everything will be fine. I hope
this will help. I will be submitting a piece in the future, on what I found
to be the best way to install strings. Good luck and happy building.
Dave Slusser
Summerhill Studios
|
 |