|
RESHAPING THE FM TV'S NECK |
|
Sometimes it goes great, sometimes it goes...not so great. The FM TV
is one of my favorite development guitars, but the neck just was not happening.
The "I'm gonna make it like an old Junior" left the neck baseball bat-like,
and pretty much unplayed at GuitarAttack World Headquarters. It was
clear -- the neck had to be reshaped!
WARNING: This is an irreversible procedure, and must be
completed in a very precise manner or you will potentially ruin your guitar.
Complete procedures like this one at your own risk, and you shouldn't try
this if you have the slightest doubt about your ability to pull it off!
Finally, this will ruin the value of your vintage guitar, so we recommend
you don't try this on anything other than a beater. |
|
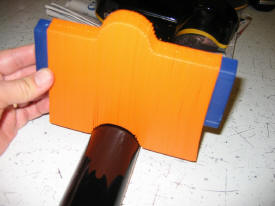
| First things
first. We measured the neck of a Les Paul we really like, and decided
to use it as a template for the FM TV's neck. Using a plastic contour
gauge we bought at Woodcraft, we measure the "template" neck at the nut, 1st
fret, 5th fret, 9th fret, and 12th fret. The bizarre shadow on the
neck is a reflection of the orange gauge on the Les Paul's shiny black
finish. We use these frets because it allows us to get a general lay of the neck and avoids the drudgery -- and near impossibility -- of measuring every inch of the neck. We made a cardboard template using the measurements from our gauge. Note: We complete the measuring procedure with a number of the guitars we repair. Remember to protect the finish on the "donor" with some thin tape to avoid scuffing the paint with the gauge. |
|
|
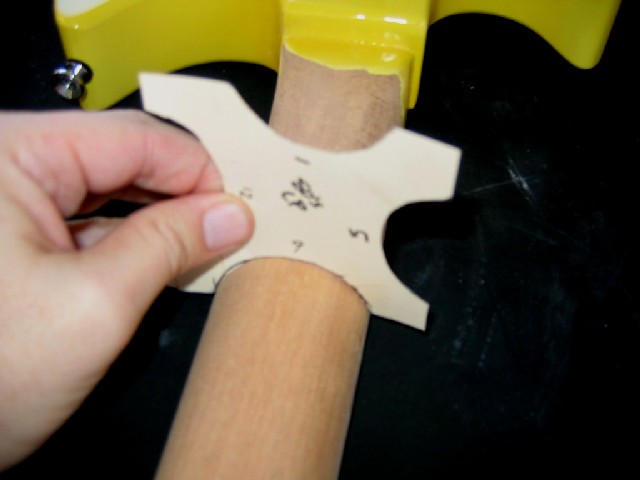
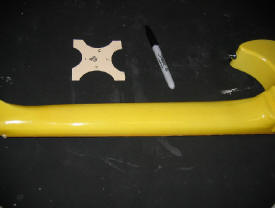
Here are the key ingredients
for the Nip/Tuck on the neck. The cardboard template on the left --
made using a regular manilla folder -- representing the neck profile (as
measured above) behind
the first, fifth, ninth, and twelfth frets, a Sharpie marker for laying out
the "cuts", and the kind of TV-finished FM3 neck.
|
 |
|
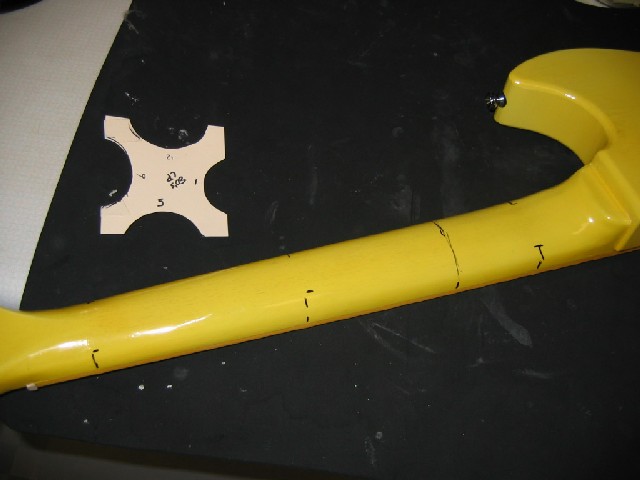
Like Dr. 90210, we lay out our cuts before we get the scalpel out. Here we can see where the initial cuts will take place and we know how much we need to take off based on our template. We decided to not strip the finish because we were going to grind and cut it off anyway during the neck reshaping process. How is that for being subtle? Click the photo for a full-size view. |
|
|
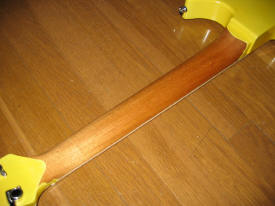
Using our MicroMark rasps,
sandpaper, files, cabinet scrapers, and other wood tools, we slowly start to
reshape the neck (see our Double Neck page for more info). The idea is to make the cuts on the places with marker
first, then connect the dots, or smooth and level the neck between the cuts.
Here is a shot of work in the vicinity of the 9th fret. Click the
photo for a full-size view.
One of the most useful tools
in this process is the sandpaper "shoe shine rag". We take a strip of
3m SandBlaster paper -- normally between 180 and 240 grit -- and cut a strip
about 1" wide and 8" long. Like polishing a pair of black shoes, we
take the sandpaper and go left and right perpendicular to the length of the
neck. The neck winds up really smooth, and it allow you to take a
little wood off at a time. |
|
| Working from
the nut toward the heel, we smooth out the peaks and valleys until we get a
nice, smooth neck. Yes, the strings are still on it, and it sure helps
to feel how the neck has changed by playing it. We've found that just changing the profile doesn't necessarily impart the same feel as another guitar because of the fret size and general action. Also, changing profile requires that the "donor neck" is the same scale as the "receiving neck" or the profile will be a no-go. By the way -- this guitar has a bound neck. Make sure you protect the binding with some tape to keep from destroying it while sanding, filing, and rasping. As was expected, we still had to do some sanding and leveling to get the neck to feel right after the template "fit". We decided to play this one a while before fixing the finish. Since it is one of our development guitars, we wanted to make sure the neck was correct before going through the trouble of more TV finishing. To keep from making a mess of the finish down the road, we rubbed-on a very thin coat of shellac on the exposed mahogany so we could play it without fear of contamination. We'll sand it off prior to starting the refinishing. The shellac? Good old Zinnsser Seal Coat, our favorite shellac product, available from Woodcraft.
Time to log some playing time!
We scored a set of old time Bill Lawrence P-90-size humbuckers a while back.
They might be the very thing to set this rig off! |
|
| Well, that is about it. Remember -- if you take too much off, you are stuck with it! More to follow on repairing the finish. | |
| Back to FM TV Page 4 | |
| ATTACK HOME REPAIR MAIN | ||||||||||||||||||||||||||||||||||||||||||||||||||||
|
||||||||||||||||||||||||||||||||||||||||||||||||||||